Math IT Support →
Printer Friendly Version
Math IT Support
1. FAQ
1.1. Where are there computers that I can use?
Graduate Student Labs
Graduate Computing Labs are located in Math 401N and Math 227
Please contact your graduate coordinator if you need the combination for the door.
There are six Ubuntu computers in each room.
Any
grad student in our department with a network account can log into
these systems. These machines are not suited for CPU-intensive jobs, if
you need to do heavy computations, please use the Chivos
Occasionally, grad students may run jobs on lab machines. Before you
ever attempt to run jobs on another machine or in the background of a
lab machine, learn how to do this properly
Windows Computers
There is one Windows computer in M227.
Scanner
There is a flatbed scanner attached to the Windows computer in M227.
Printers
The computers are connected to the Konica Minolta Printer/Copier in Math 401.
Faculty/Visitor Lab
The Computing Lab for Faculty and Visitors has been merged with the Graduate Student Lab in Math 401N.
- 2 Linux Ubuntu Desktops
- Windows 10 Desktop
- iMac
This is also the location of the Konica Minolta Printer/Copier
Math Center Room 220
This is for undergraduate students.
- One Linux Ubuntu Desktop
- One Windows 7 Desktop
- Both have access to Maple, Mathematica, and Matlab
Math 101
Computer classroom with 7 Windows computers plus a teacher computer and projector
Math 102
Classroom with a teacher computer and projector
Math Tutoring Room MTL 121
There are 3 Windows computers available for the students and teachers.
1.2. Where can I learn about technology service outages?
Where can I learn about technology service outages?
For math Department related outages, you can check our twitter feed @UAMathComputing YOu do not need to have a twitter account to view the information.
For other University-related issues, check the UITS page https://it.arizona.edu/
1.3. How do I print?
How do I print?
Please see this article https://ua-math-dept.helpspot.com/ITSupport/index.php?pg=kb.page&id=26
1.4. How do I change my Math password?
2. Email
2.1. E-Mail Client Configuration
The Mathematics Department uses Google Apps for Education (Gmail).
Prepare:
Set up your client:
2.2. Email Details
Members of the Math Department have two different email addresses - one from the Math Department and one from the University.
Math Email Basic Facts:
How to:
2.3. Using an IMAP Client with Gmail
First Steps for Getting Thunderbird/Other IMAP to Work with Math Email
You need to enable IMAP in your GMail account. Here's how:
- Sign in to Gmail.
- Click the gear icon on the top right.
- Select See All Settings.
- Click Forwarding and POP/IMAP.
- Select Enable IMAP.
- Click Save Changes.
2.4. Web Mail
Email can be accessed by going to gmail.math.arizona.edu.
Here you can get all your Google Apps in one place and you can change
many settings, including vacation messages, forwarding, and folders.
- Log in using your full math email address and math password.
- If your browser has remembered some other gmail account and
prefilled the information, simply click on "Add Account" or "Login as a
different user".
2.5. Email Forwarding
This article describes how to:
1. Forward your University Email to your Math Email
or
2. Forward your Math Email somewhere else
Forwarding Your University Email to your Math Email -Faculty and Staff
How to forward email from your Office 365 account Faculty and Staff Only (see below for Students) to another email account, such as your Gmail account.
Sign in to Office 365 at http://outlook.com/owa/email.arizona.edu
At the top of the page, choose
Settings 
> View all Outlook settings
Choose Forwarding.
Make sure Enable Forwarding is selected and your Math email address (username@math.arizona.edu) is typed in the box. If you would like a copy of the forwarded messages to also remain in this inbox, check the box next to "Keep a copy of forwarded messages."
Click on the Save button. (If you haven't changed anything, you won't be able to click on Save).
Forwarding Your Math Email Elsewhere
Please see the instructions for Google Apps here https://support.google.com/mail/answer/10957?hl=en
These instructions will also work for CatMail (U of A Student email)
2.6. Auto-Replies (Vacation Responses)
Please see these Google App Instructions:
https://support.google.com/mail/answer/25922?hl=enhttps://support.google.com/mail/answer/25922?hl=en
2.7. Math Gmail Settings for Thunderbird
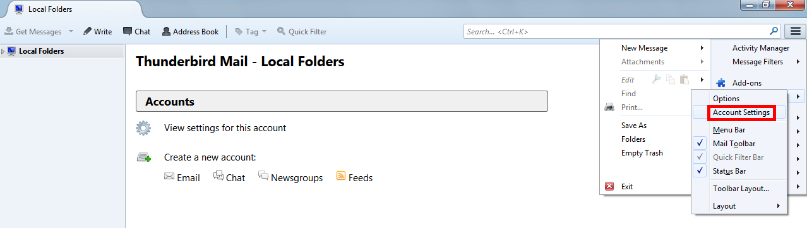
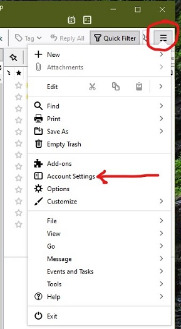
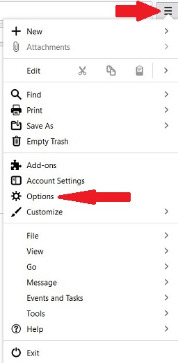
In Thunderbird, go to Options, Account Settings. (You can get to it by clicking on the icon that resembles 3 lines).
2. Choose Add New Account from the bottom left.

3. Input your name and your Math email address. You can put your password in now, or uncheck the "Remember" box and do it later. Thunderbird will automatically determine the connection
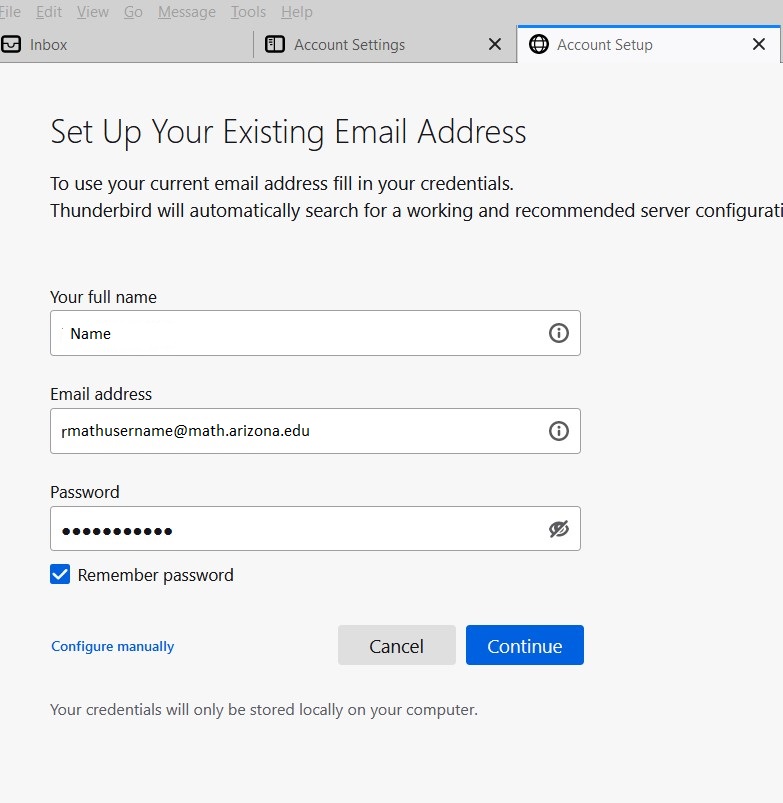
information. Click on Continue.
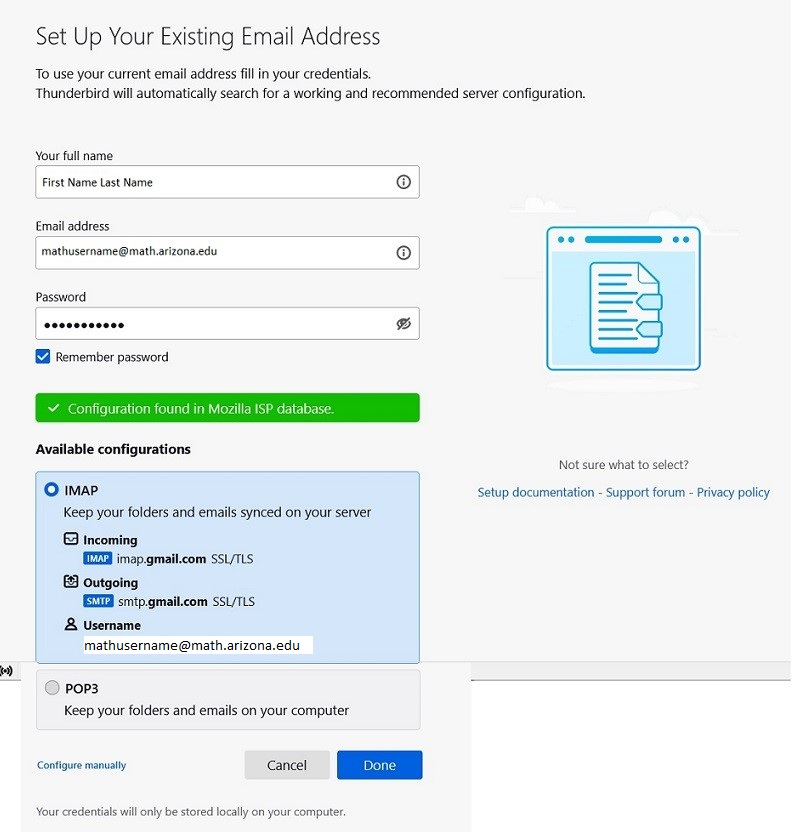
4.The proper server information should appear as shown below. For username entire Math email address should appear.
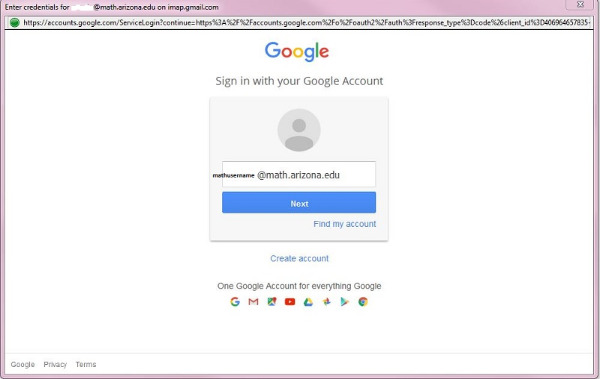
5. Click on Done and you should see Enter Credentials window with your your email address. Click Next and enter your math password and Click Sign In
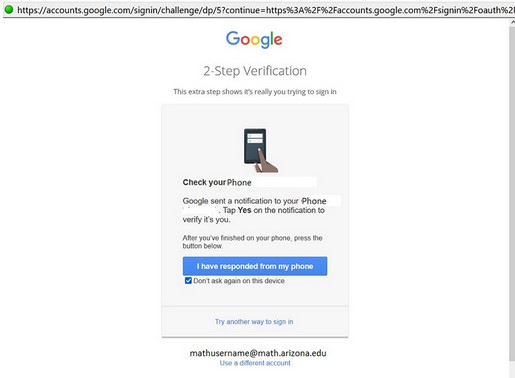
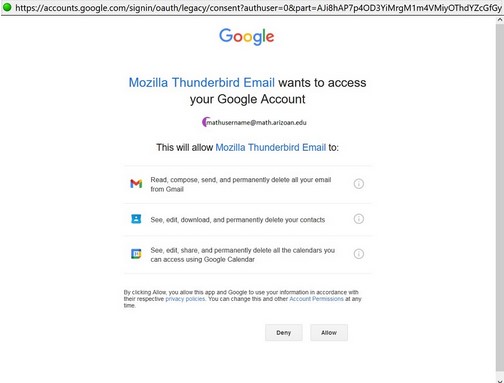
6. Click Allow
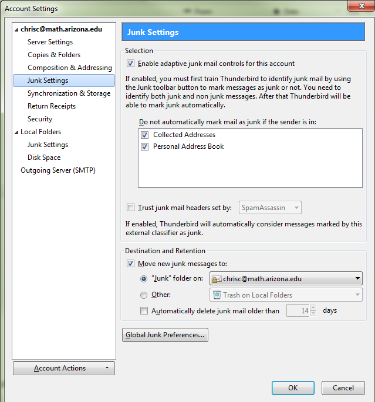
7. You may also want to enable the Junk Filter as below:
Login error? Check server settings, click here
Still having trouble? Click here
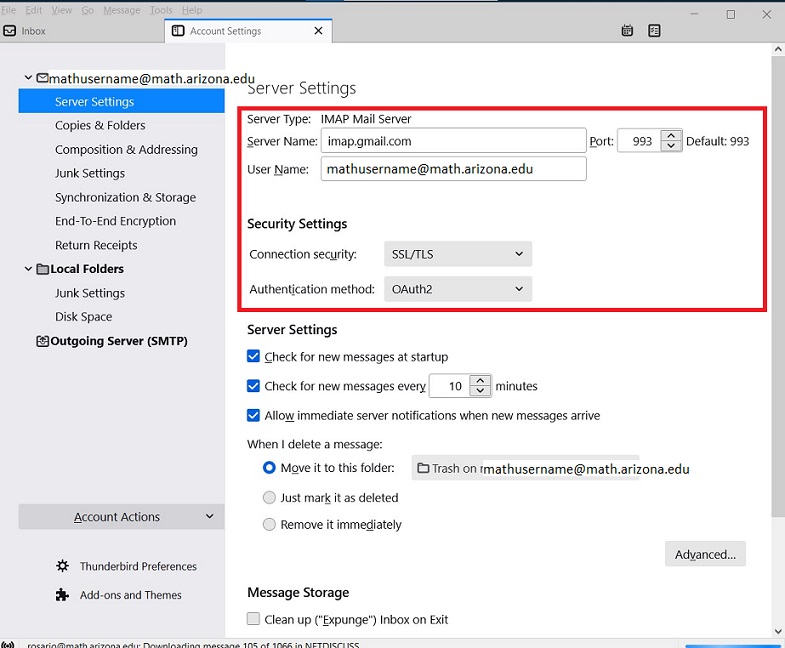
2.8. Thunderbird-Gmail Server Settings
In Thunderbird, Go to Menu, Account Settings
Select Server Settings, Under Security Settings, for Authentication method, Select OAuth2
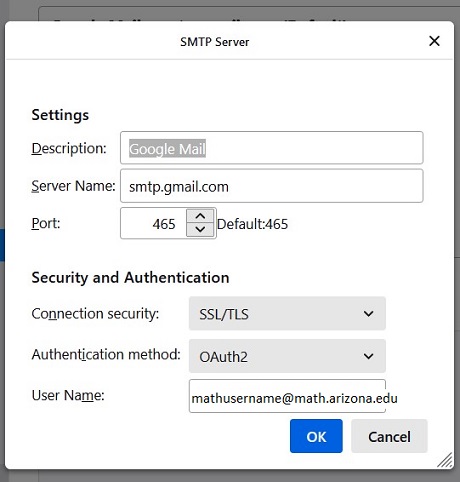
Select Outgoing Server (SMTP), Select smtp.gmail.com option, Edit..., for Authentication method, Select OAuth2
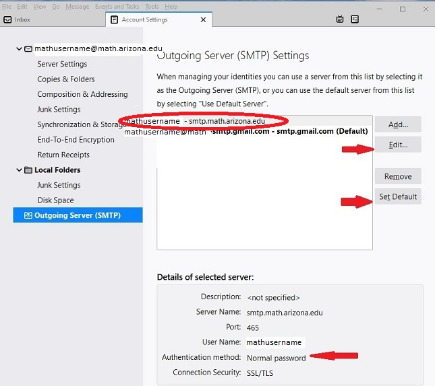
2.9. Thunderbird - math smtp server
For staff who send bulk messages in Thunderbird and have our math server for Outgoing SMTP Server.
Set Authentication method:
In Thunderbird, go to Menu, Account Settings

Select Outgoing Server (SMTP), Select smtp.math.arizona.edu option, Edit..., for Authentication method, Select Normal password
Configure minimum version for TLS:
In Thunderbird, go to Menu, Options
Scroll to bottom, Select Config Editor...
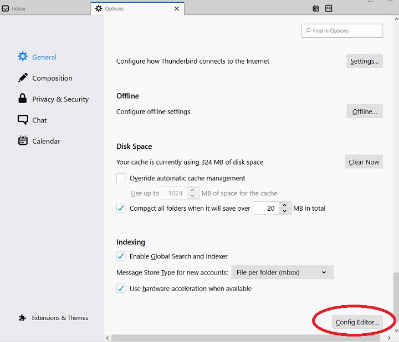
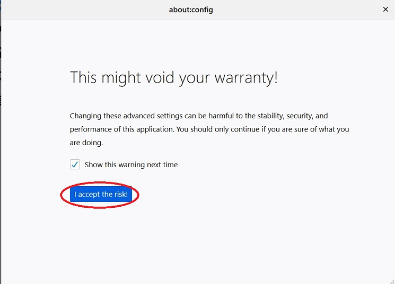
Select Accept the Risk
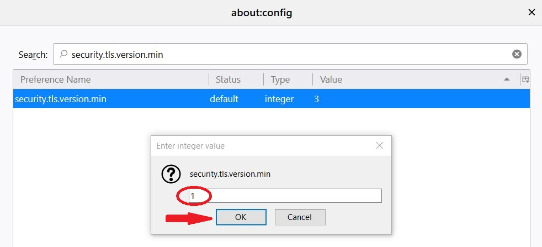
In about:config window, Search box, Enter: security.tls.version.min, double click it

In Enter integer value window, Enter: 1, Click OK
2.10. iPhone and iPad Setup for Math Gmail
- Tap on the Settings Icon

2. Choose Mail, Contacts, Calendars
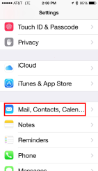
3. Choose Add Account
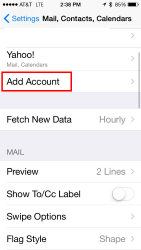
4. Choose Google
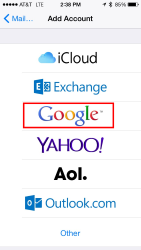
5. Login with username@math.arizona.edu and your password
6. Accept the conditions
7. The account should now be set up and visible in your email app
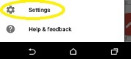
2.11. Android Setup for Math Gmail
1. On Android device, go to Apps and open Gmail

2. In Gmail, click on the menu button

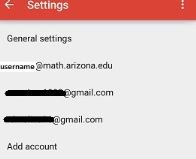
3. Select Settings
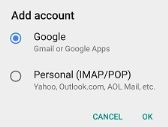
4. Select Add account
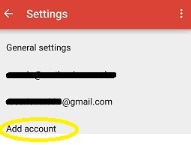
5. Select Google
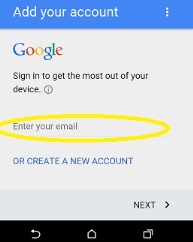
6. Enter your math email
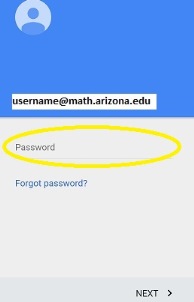
7. Enter your math password
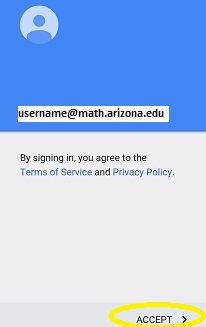
8. Accept Agreement
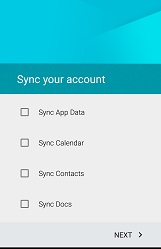
9. Select items to sync
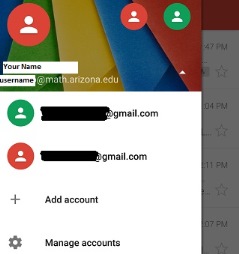
10. Account should be added to list
11. If you have more than one Gmail account, you can switch viewing the Inbox. In Gmail app, Select Menu, Select Gmail account

* *If you do not want to use the GMAIL app, you can use the MAIL app**
Click on Mail app, Click on 3 squares on top right
Select Add account
Select Other(POP3/IMAP)
Enter: username@math.arizona.edu
Enter: mathpassword
NEXT
Incoming settings
Protocol: IMAP
Email address: username@math.arizona.edu
Username: username@math.arizona.edu
IMAP SERVER: imap.gmail.com
SECURITY TYPE: SSL(Accept All Certificates)
SERVER PORT: 993
NEXT
Outgoing server settings
USERNAME: username@math.arizona.edu
PASSWORD: mathpassword
SMTP SERVER: smtp.gmail.com
SECURITY TYPE: SSL(Accept All Certificates)
SERVER PORT: 465
Account Name: your choice
Your Name: enter your name
FINISH SETUP
**Note: Inbox by Gmail does not work **
2.12. Mac Mail Setup for Math Gmail
El Capitan 10.11 and Sierra 10.12
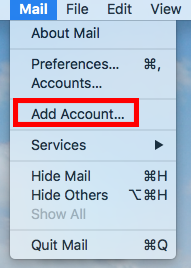
- Open the Mail app on your computer.
- Select Add Account
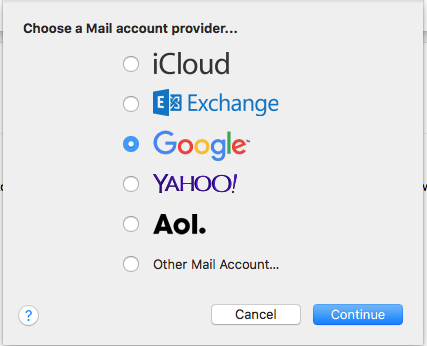
- It will ask you to sign in. Use your entire Math email address.
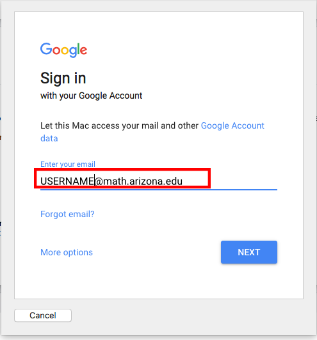
- Click Next and then enter your Math password.
- It will ask you which apps you want to use. Choose Mail. You may also want to choose Calendars.
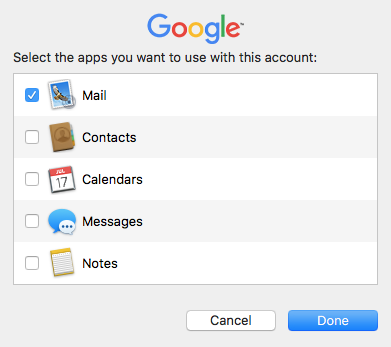
Your Math email should now start appearing in the Mac Mail App.
Mavericks 10.9 and Mail 7.3:
If you see a prompt to add an account when you open Apple Mail, skip to step 5:
- Open the Mail app on your computer.
- Select the Mail menu at the top, and then Preferences.
- Open the Accounts section.
- Click the + button in the bottom corner.
- Choose Add Other Mail Account. Click Continue
- Type your name,your full email address (e.g. username@math.arizona.edu), and your math password. Click Next.
- It will tell you that the account must be manually configured, Click Next.
Account Type is IMAP.
Mail server: imap.gmail.com
User Name is your full email address (e.g. username@math.arizona.edu)
Password is your Math Password
Click Next
SMTP Server: smtp.gmail.com
- User Name is your full email address (e.g. username@math.arizona.edu)
- Password is your Math Password
Click Create
Yosemite 10.10 and Mail 8.2:
System preferences, Internet Accounts, Add Other Account…,
Add a Mail account, Create…,
Full Name:
Email Address:
username@math.arizona.edu
Password: math password
Create
Account must be manually configured, Next
Account Type: IMAP
Mail Server:
imap.gmail.com
User Name:
username@math.arizona.edu
Next
Outgoing Mail Server Info
SMTP Server:
smtp.gmail.com
User Name:
username@math.arizona.edu
Password: math password
Create
In Internet Accounts, Click on google account just created
Sign in with your
username@math.arizona.edu
OS X would like to
View and manage mail, etc.
Accept
Open Mail app
Click on Mail, Preferences…
Advanced
Port: 993, Use SSL is checked/selected
Click on Account Information
Outgoing Mail Server, Select Edit SMTP server list
Select Server
Select Advanced
Port: 587, Use SSL checked
Authentication: Password
User name:
username@math.arizona.edu
Remove duplicate
smtp.gmail.com server, click on server and select -
Select OK
Make sure smtp.gmail.com:u
sername@math.arizona.edu is selected for outgoing mail server
2.13. Internal Department Email Lists
If you need to email certain members of the department, we have pre-configured Google Groups.
For a chart showing the structure of our Google Groups Email lists, please see https://drive.google.com/open?id=0B40e9Z9kAtceM2RVbE93Y3NjZ3c
You must log in with your Math account email and password to view this.
If you have questions regarding the memberships of these groups, please contact the Head Office: http://headoffice.math.arizona.edu/
3. Math Accounts
3.1. Turn on 2-Step Verification for your Math account
For proper security, you should enable 2-Step Verification for your Math Department Google Workspace for Education Account. This includes your Math email account, Google Docs, Google Sheets, etc.
- Go to https://accounts.google.com
- Sign in with your @math.arizona.edu email address and math password
- In the navigation panel, select Security.
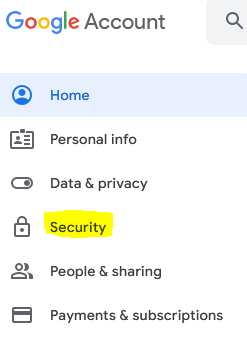
- Under “Signing in to Google,” select 2-Step Verification
 Get started.
- Your second step can be:
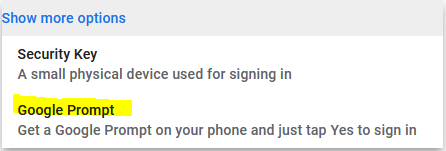
- You will be asked for a phone number. Here you can choose text or phone call. Click on "Show More Options" if you want to use a Google prompt.
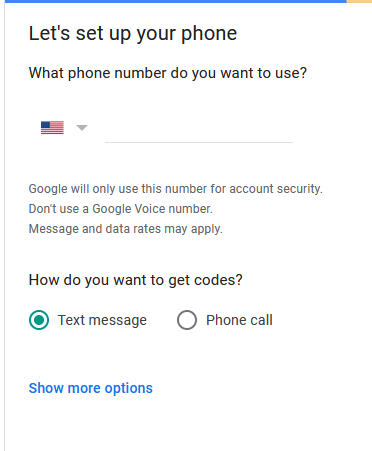
- Follow the on-screen steps. You will have to log in again.
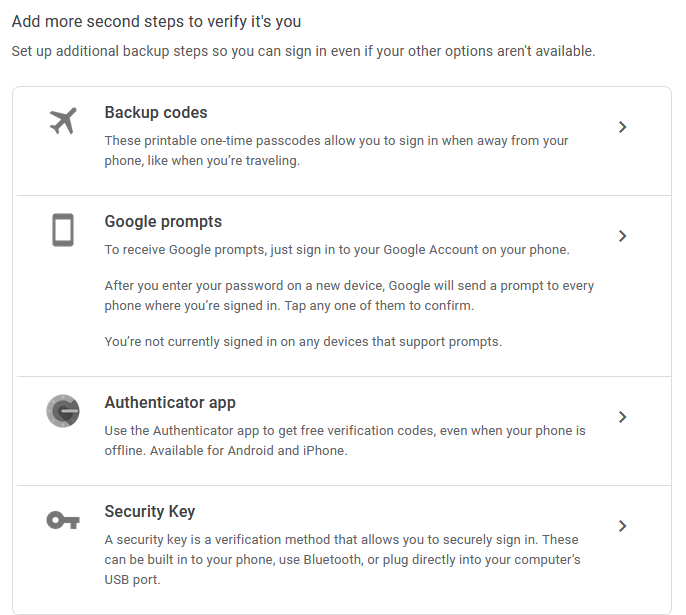
- When you are finished you will have the option to add more second steps
3.2. Department of Mathematics Network Accounts
Who needs a network account?
To use many of our services, you must have a network account. Among other things, this gives you:
Since our servers run Linux, network accounts are sometimes called "Linux accounts"; they are also called "system accounts" or "e-mail accounts".
Usage of e-mail and network accounts is subject to the general university-wide computing policies.
Who can get an account?
All incoming faculty, staff, postdocs and grad students automatically get a Math account when they join the department.
We also offer accounts to undergraduate math majors engaged in research with math faculty. Other affiliates may also receive accounts by special request. Accounts are created to host websites for departmental groups or projects.
How do I get an account?
Simply contact the support staff with the request. Please include the following information about the person who will receive the account:
- First name and last name
- Affiliation to the department
- Existing e-mail address (preferably your email.arizona.edu address, if you have one)
- Optional: suggested account name (to avoid name conflicts, we may end up assigning a different name)
Once the account is created, we will use the existing e-mail address to inform the user of their new account name, and ask them to follow these instructions to get started using the new account.
If I leave the department, when will my account be removed?
Please see our account removal page for more information
3.3. New Account Information
This page gives information on Math network account setup. If you run into difficulty, please ask us for help.
Your network account: stores e-mail, lets you publish a personal website, and gives you access to our scientific software.
3.4. Network Account Management
Below
are some common tasks related to managing your UA Math Network Account.
If you believe there is something else that should be added to this
list, please don't hesitate to email system@math.arizona.edu.
3.5. Passwords
Mathematics Network Account Password Change Procedure:
- Click on the following link: change your password
- Enter your username (NOT your whole email address) and your current password.
- Enter your new password twice.
- Click Save and you will get a response confirming that the password has been changed.
Note: It may take up to 30 minutes for this change to affect your Math GMail password.
Password Rules:
- A password must be at least 10 characters in length.
- A password must consist of any 2 of the following: uppercase letters, lowercase letters, numbers, or punctuation.
- Passwords cannot be dictionary words or dictionary words spelled backwards.
- Passwords cannot be dictionary words with an added digit.
- Passwords cannot be repeated sequence of a few letters eg: aaabb.
Tips for creating a good password
- Mix up the password with letters and numbers and symbols e.g: (!@#$%^&*-=[]{};',./<>)_+.
- Change your password regularly and use different passwords for your math account and netid.
- If you a going to keep a written reminder of your password, keep it locked or in a wallet.
- Never use a password that is simple. E.G.: "password123", "Dragon1", "iloveyou"
- Never use a password that would be easy for someone who knows you to guess. E.G.: birthday, maiden name, last name, place of birth
- Never use your username as part of your password
3.6. Account Quotas
Account Quotas
Every Department of Mathematics network account has a disk quota which
limits the amount of file system space you can use. The default quota
for new accounts is 1 gigabyte (GB). If you find that 1 GB isn't enough,
please contact the computer staff to request a quota increase.
If you fill up your disk quota, you may not be able to log in at all.
Checking Your Disk Quota
To check your quota, do the following
- Open a terminal window. (If you are doing this remotely, then connect to your network account using SSH.)
- Issue the command quota. This will tell you:
- The filesystem you are using;
- The number of 1 KB blocks you are using;
- The quota of how many 1 KB blocks you are allowed to use;
- The absolute limit (you can temporarily exceed your quota in some cases, but you can never exceed this limit);
- The number of files you are using.
- If your account runs out of space, you might even be unable to log in graphically. (But you should still be able to connect remotely via SSH, allowing you to delete some files.)
- Disk
space is often used by your browser's cache. Inside your browser's
Preferences, try reducing the cache size, or clearing the cache.
- The command du -h --max-depth=1 might help you determine where your big files are, just make sure you run it from your home directory.
- If you are involved in a Math Department activity that requires you to have more space, then please contact the computer staff to request a quota increase.
3.7. Network Account and Math Email Removal
Math Department Policy on Account Termination
 Please Note: These policies are likely to change soon due to new security requirements mandated by the University! We suggest moving your email and files and closing your account as soon as possible after you leave. See this article for transfer information.
- When your affiliation with our department ends we provide a grace period before account deletion so that you can move your e-mail and account files. The standard grace periods are:
- Graduate Students: Your account will be terminated at the end of the semester following your graduation.
- Faculty: Your account will be terminated one year following your separation from the department.
- Staff: Your account will be terminated immediately following your separation from the department.
- You will be notified at your math email address before the account is deleted. If you have a special need to temporarily retain access to your account, please contact us to discuss your options.
3.8. Transferring your Math Google Workspace for Education email and files
Transfer Files to Personal Google Account
Google has a transfer service available from your Google account dashboard. This feature will automatically transfer your Math Gmail and Drive files you own and upload them to your personal Google account. If you do not have a personal account, you can create one for free.
IMPORTANT NOTE: When you start the process of migrating your account data to your personal account, open an incognito/private browsing window or use a different browser than you normally use. This will help to ensure the transfer will start.
- In a private/incognito browser window or different browser, log in to your Math Gmail account at http://gmail.math.arizona.edu.
- Access the tool from https://myaccount.google.com/. Or, from the upper right corner of the window, select the Google Account icon and then select Manage your Google Account.
- From the home page, select Start transfer under Transfer your content. Complete the steps:
- Enter a destination account
- Verify your destination account
- Select the content to copy and transfer.
Be patient. The process may take up to several days to complete, particularly if you have a lot of data to transfer.
Download Files to Your Desktop
If you don't have enough storage space available in your personal Google account, or if you want to store your files elsewhere, you can download your files.
In a private/incognito browser window or different browser, log in to your Math Gmail account at http://gmail.math.arizona.edu
Access tool from https://takeout.google.com.
From the home page, select the data you want to download, then click Next Step.
Decide how often to export, the file type to use, and the threshold for splitting data into multiple compressed files.
The process may take up to several days to complete if you have a lot of data. You will receive an email with the link to download your data.
See more information on Google Takeout.
4. Printing
4.1. Printer Access
Konica Minolta Printer/Copiers - KM-401 and KM-ENR2
Located in the Math building room 401N and in ENR2 Floor 3
- These are multi-function units - copier, scanner, and printer.
- They are on our network. You can print to them from your computer connected via ethernet cable, or WiFi (Math VPN connection is required for WiFi).
- Printing is secure - pages do not print until you release the print job, by logging in at the printer.
NEW! You can now log in by swiping your CatCard! https://ua-math-dept.helpspot.com/ITSupport/index.php?pg=kb.page&id=31
- There is a per person quota - you can check the status of your quota. If you have questions, contact the Academic Office (academics@math.arizona.edu) for quota information.
Instructions for setting up the printer on your computer are here:
Linux
Bulk jobs (printed course materials or exams for example) should be handled with the main office copier. This is still by far the most cost-effective way for us to do copying, so we appreciate your cooperation with this. Printing requests can be uploaded at photocopy service request form.
The shared printers in the Math Tower hallways and Grad Labs will be phased out as their current print cartridges expire.
The Room 108 staff will be responsible for restocking paper in the copiers, but we do appreciate your assistance in notifying them if you notice that the paper supply is low
4.2. Adding the M401 and ENR2 Konica Printers to a Windows Computer
 NOTE: These instructions work if the login name for your PC matches your Math username. If this is not the case for you, please open up a command prompt and type whoami Contact system@math.arizona.edu with the login name that was displayed.
First, download and extract the driver for a personal computer:
- Go here to download the zip file. You will need to be logged in to your Math Google account. Click on the download icon

- After you have downloaded the zip file, extract the files, but do not run any installers.
- In step below, when it asks you to select a printer, choose Have Disk and browse to this directory (in the files you just downloaded) \Drivers\PCL\EN\Win_x64
- Choose KOAXDJ__.inf
- It should then have the Konica Minolta as a choice.
Next, make sure you are on the Math network, either via an ethernet wired connection or with the Math VPN (click here) on wireless.
Then, add/install the printer and drivers:
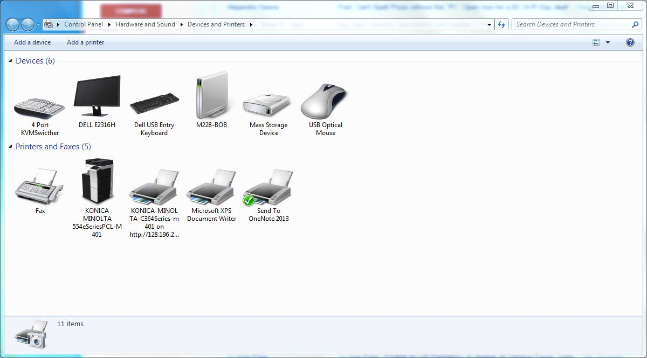
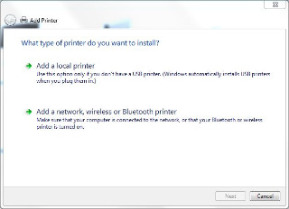
Open Control Panel > Hardware and Sound > Devices and Printers > and click on Add a printer
Note: If you are on Windows 10 and can't find the Control Panel, search for it in the search box. Then look for Devices and Printers.
Next, click on Add a network, wireless or Bluetooth printer (this window may not appear on Windows 10 - go to the next step)
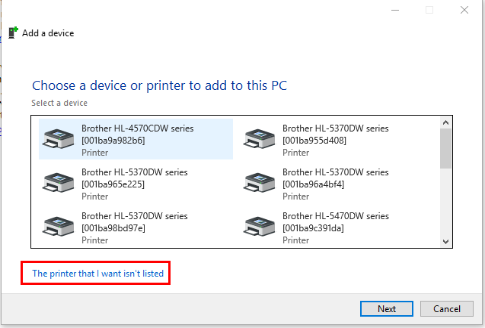
Click on The printer that I want isn't listed
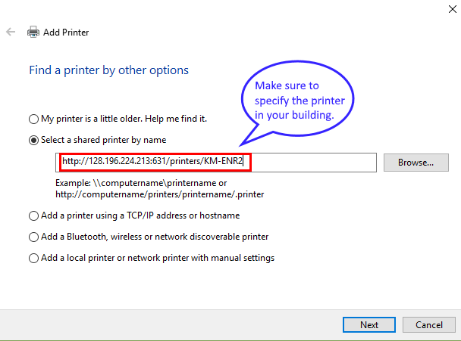
Next, click on Select a shared printer by name and enter the correct path to the printer in the field below the button.
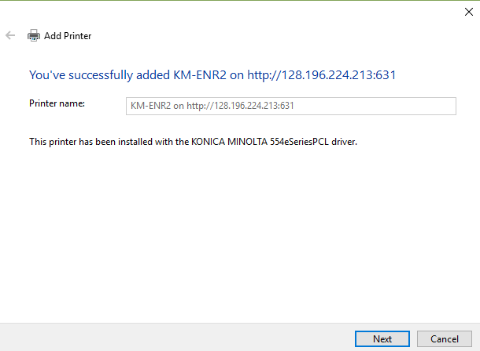
In the next window, Click on Have Disk and navigate to the KOAXDJ__.inf file (as noted in step 3 above) , select KONICA MINOLTA as the Manufacturer, and KONICA MINOLTA 650iSeriesPCL as the Printer.
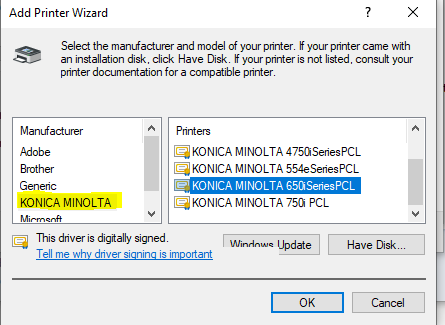
Click on OK. The next window that pops up will tell you that you've successfully added the printer. But wait, there's still more...
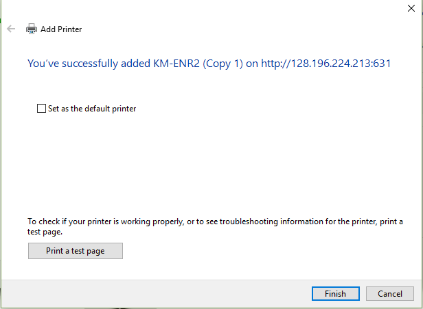
Click on Next, then you'll be given a change to print a test page. Click on Finish and you're almost done.
Last, Set Model and Finisher Settings:
Right click the printer, select printer properties, select configure tab, under device option, select Model, under setting, select 360i, click Apply.

Next, under device option, select Finisher, under setting, select FS-533, click OK.

Congratulations, you have installed the Konica Minolta BizHub 360i printer/copier!🥳
4.3. Adding the Konica Minolta Printers KM-401 or KM-ENR2 to a Mac (ver 2)
Part One: Installing the Driver
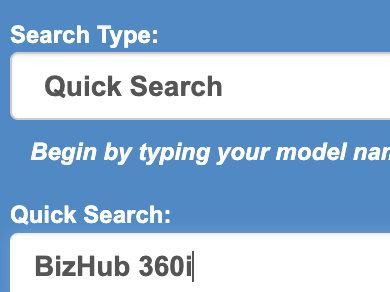
Go to this site: http://onyxweb.mykonicaminolta.com/OneStopProductSupport/
Driver to search for: Bizhub 360i (This is part of the 650i series)
Then click on the drivers button. Choose the appropriate driver for your Mac OS:
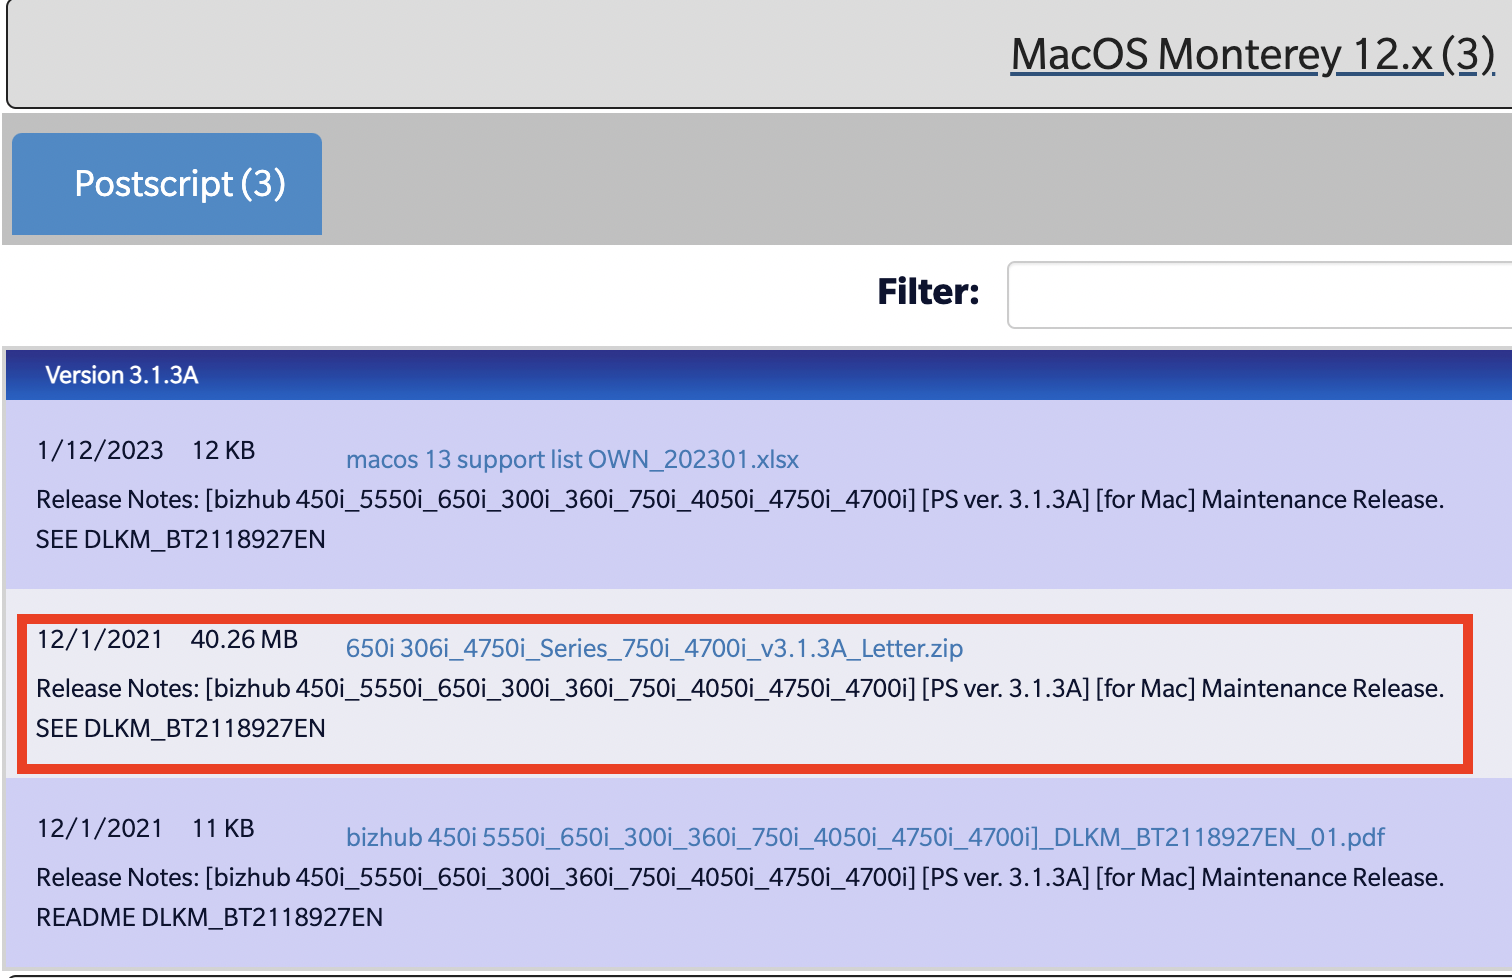
After you click on this, it will download the zip file. Go to downloads and double click it. It will unzip the folder. Inside the folder will be a .pkg. Double-click it.

The installer launches:
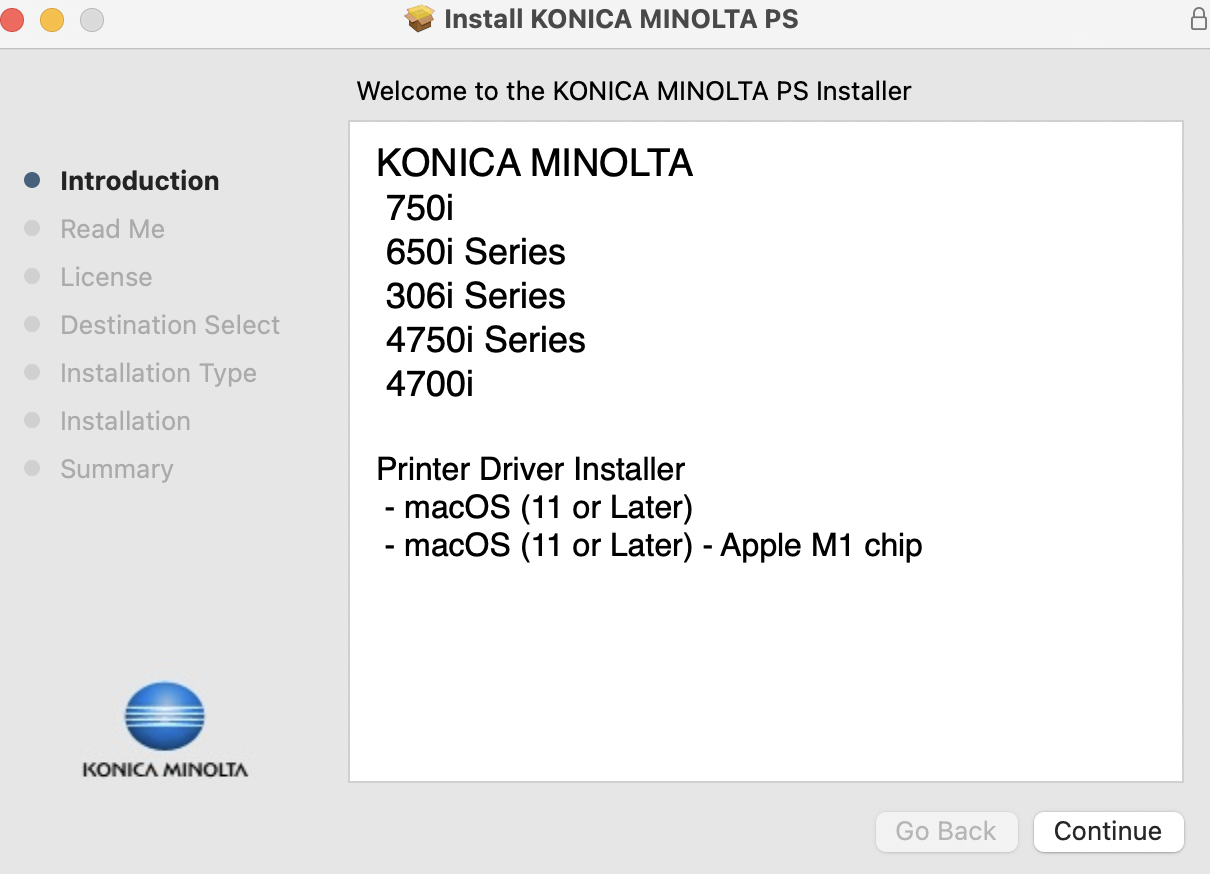
Click through all the steps for the installer until it finishes.
Part Two: Installing the Printer
| NOTE: These instructions work if the login name for your Mac matches your Math username. If this is not the case for you, open up Terminal and type whoami . Contact system@math.arizona.edu with the login name that was displayed so that we can adjust the configuration on our server. |
First, make sure you are on the Math network, either via an ethernet wired connection or with the Math VPN (click here) on wireless.
These instructions are for Mac OS Monterey or lower. See below for notes on Ventura.
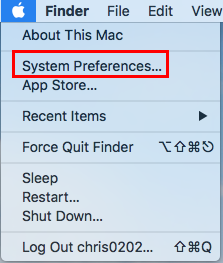
1. Go to the Apple Menu, System Preferences.
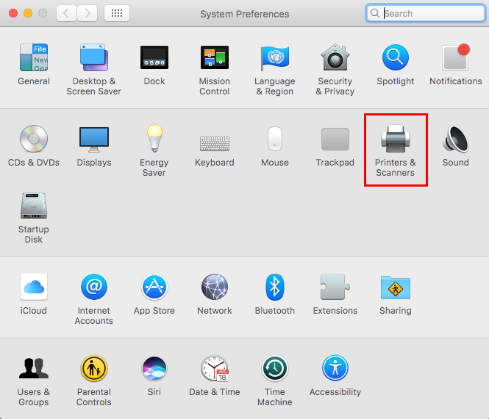
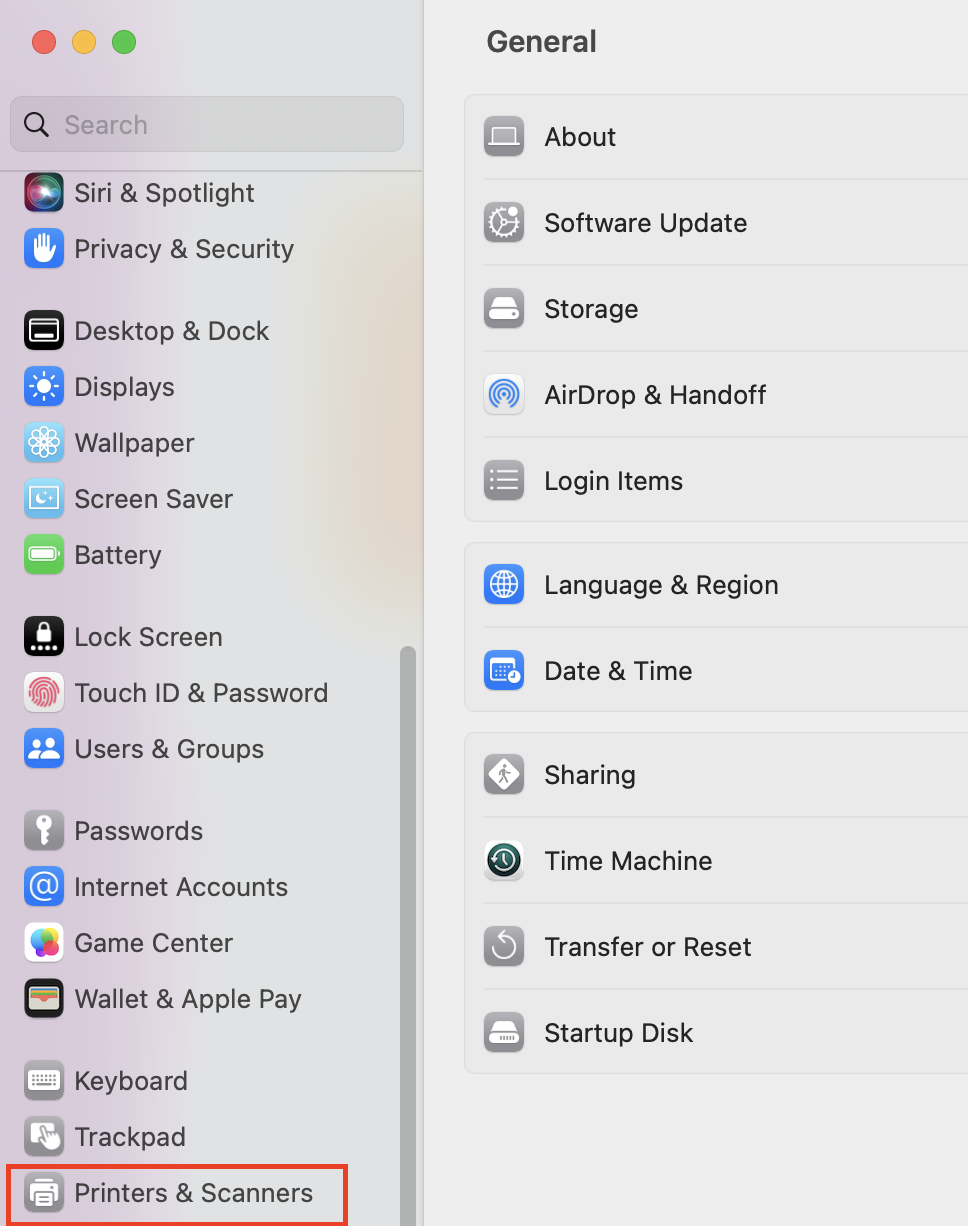
2. Choose Printers & Scanners
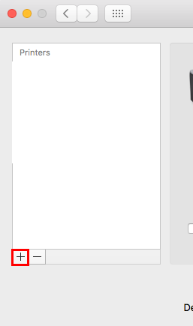
3. At the left side of the Printers and Scanners window, you will see a plus sign. Click on it.
4. Choose IP and Internet Printing Protocol as shown below.
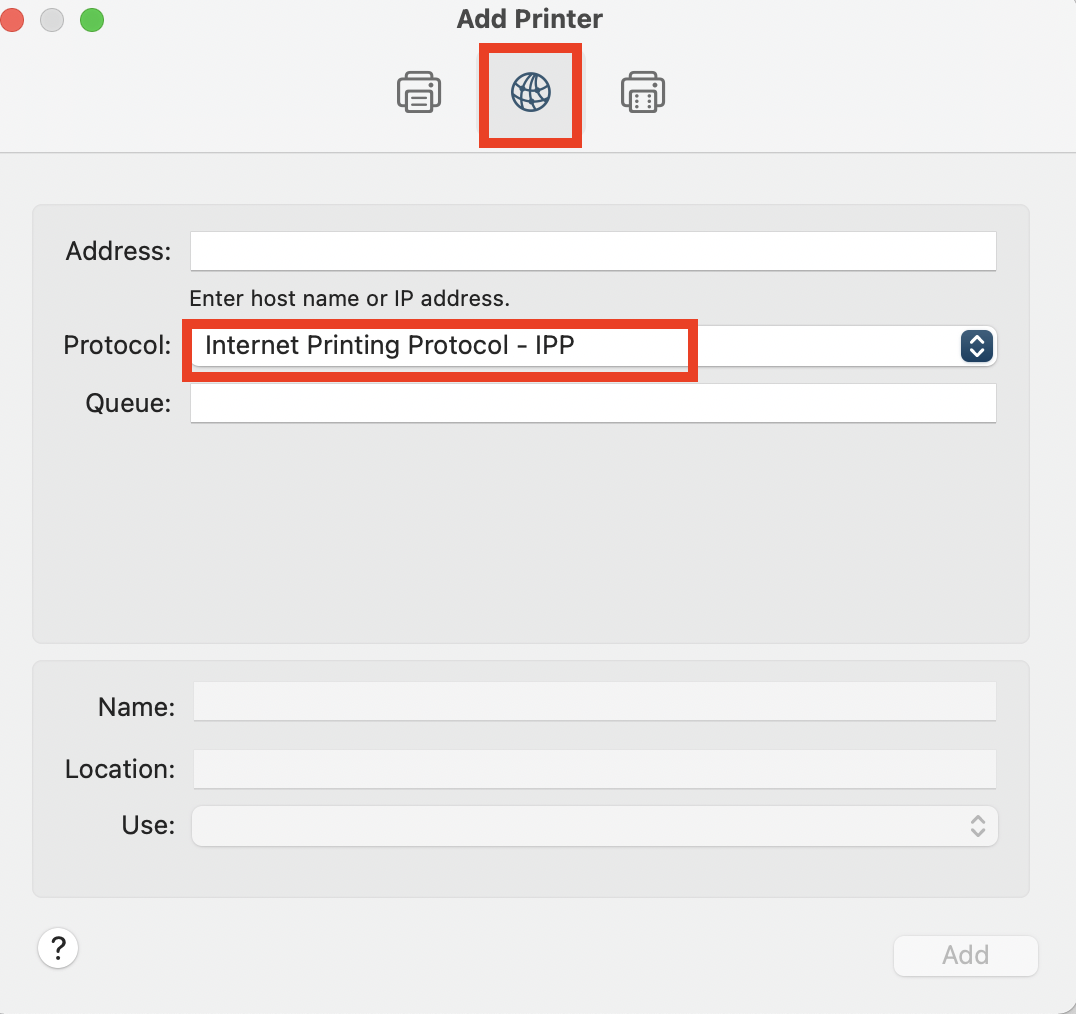
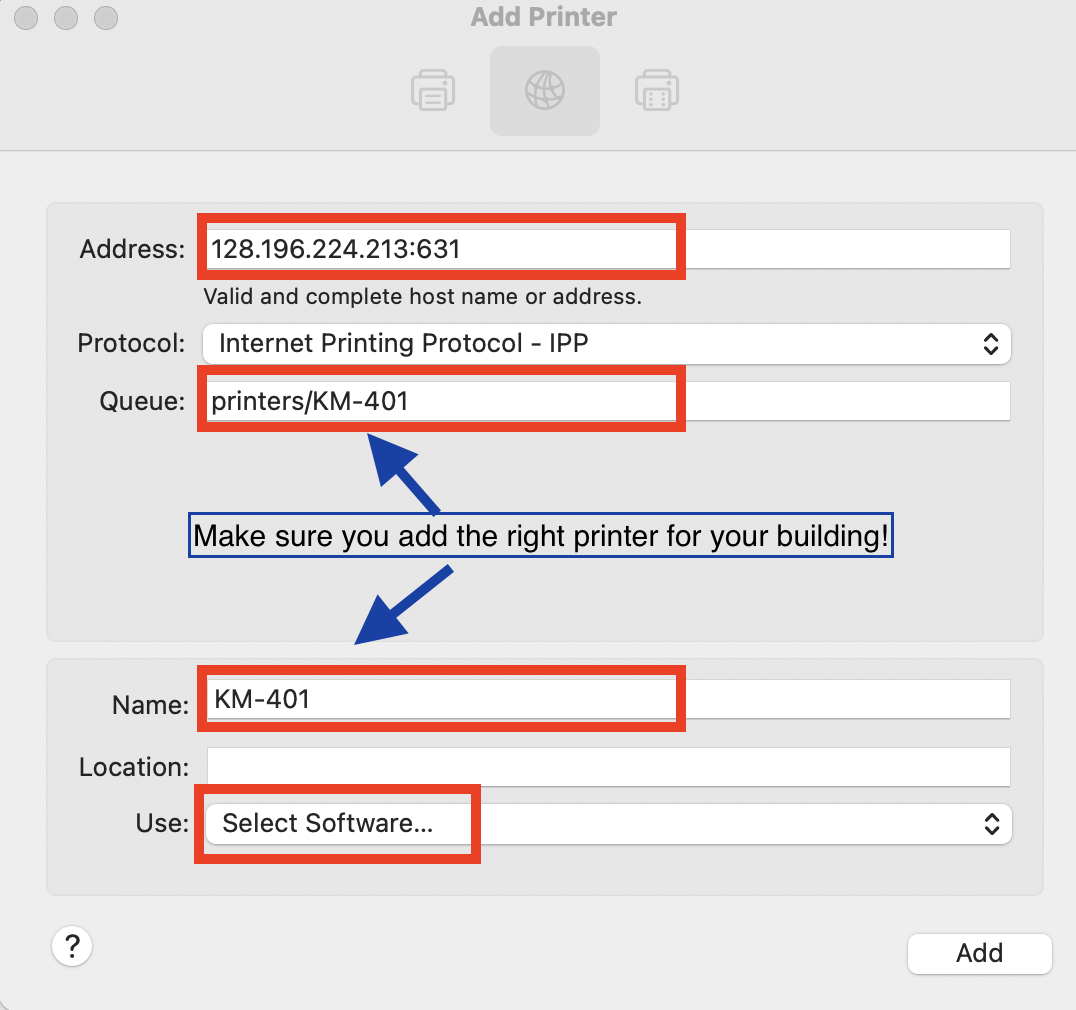
5. Enter the following for the printer you want to use.
| Printer |
Address |
Queue |
Name |
| ENR2 Third Floor Printer |
128.196.224.213:631
|
printers/KM-ENR2 |
KM-ENR2 |
| Math 401 Printer |
128.196.224.213:631
|
printers/KM-401 |
KM-401 |
For Use: Pick Select Software
10. After you choose Select Software, you will get a list of printers. Select Konica Minolta 360i PS
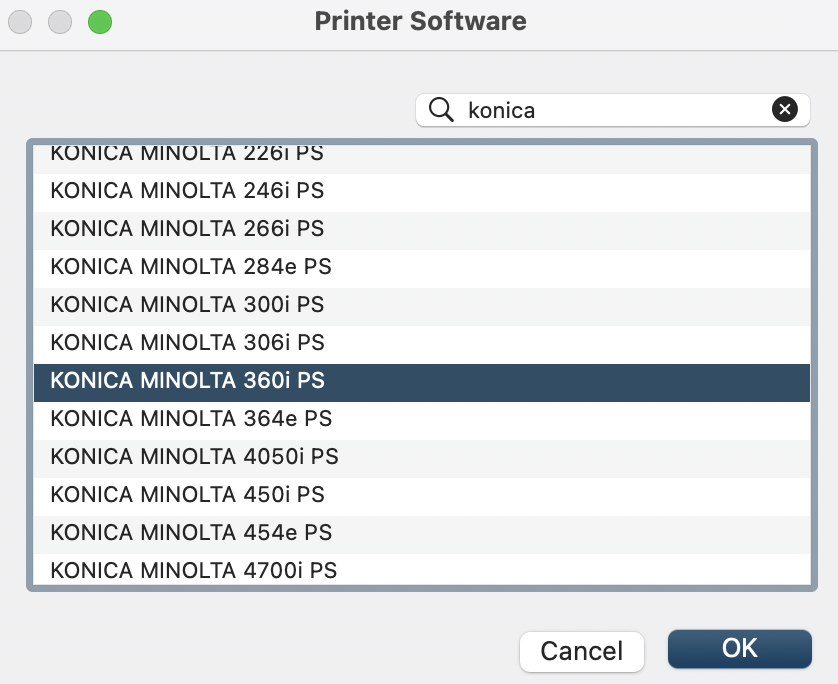
11. Click OK, then Click Add.
12. For Finisher, Select FS-533
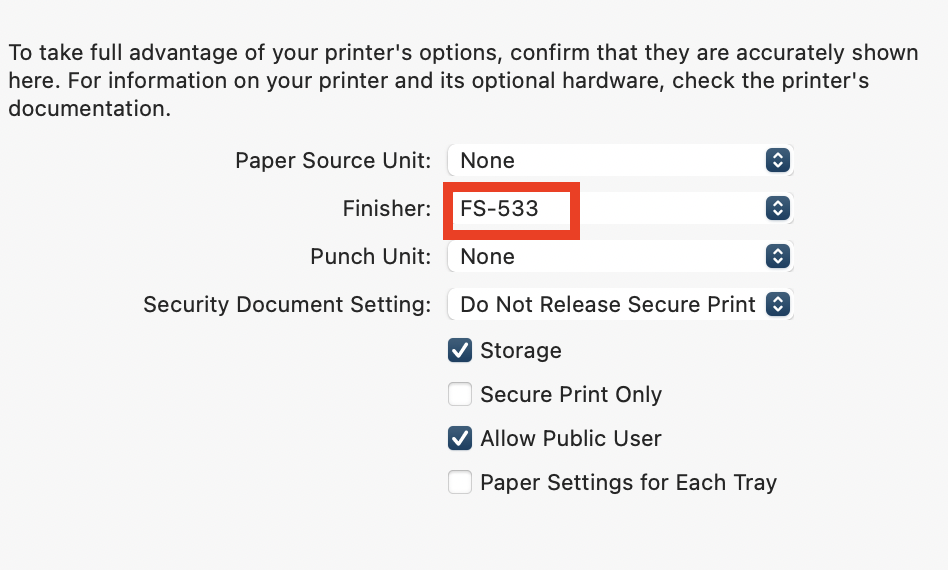
Congratulations, you have added the printer!
Notes for MacOS Ventura
You will click on Apple Menu, then System Settings, after that you will need to scroll down to Printers & Scanners or use the search.
Then click Add Printer, Scanner, or Fax

From this point on the screens should look the same as in the instructions above.
4.4. Adding the Konica Minolta PaperCut Printers on Linux
Removing and adding printers on Ubuntu Linux computers as described below requires root access. If you do not have root access on your Linux computer, send an email to system@math.arizona.edu requesting printer installation.
Prerequisites:
1. The cups daemon must be installed and running,
bob@m226c:~$ sudo service --status-all | grep cups
 [ + ]  cups
 [ - ]  cups-browsed
bob@m226c:~$
2. Check if non-PaperCut versions of the Konica printers are present (uncommon). If so, they must be uninstalled.
bob@m226c:~$ sudo dpkg --list | grep konica
ii  uamath-konica-enr2                                          1.06                                          all          Installs the Konica Minolta bizhub 364e copier on the 3rd Floor of ENR2.
ii  uamath-konica401                                            1.06                                          all          Installs the Konica Minolta bizhub 364e copier in room 401.
bob@m226c:~$ sudo apt-get purge uamath-konica-enr2 uamath-konica401
Reading package lists... Done
Building dependency tree
Reading state information... Done
The following packages were automatically installed and are no longer required:
  libpaps0 paps
Use 'sudo apt autoremove' to remove them.
The following packages will be REMOVED:
  uamath-konica-enr2* uamath-konica401*
0 upgraded, 0 newly installed, 2 to remove and 8 not upgraded.
After this operation, 0 B of additional disk space will be used.
Do you want to continue? [Y/n] Y
(Reading database ... 1360534 files and directories currently installed.)
Removing uamath-konica-enr2 (1.06) ...
Removing KONICA-MINOLTA 364e Series ENR2
Removing uamath-konica401 (1.06) ...
Removing KONICA-MINOLTA 364e Series m401
bob@m226c:~$
Adding the printers:
1. Download the appropriate .deb package for either printer
- Click here for the 401 printer
- Click here for the ENR2 printer
2. Install the PaperCut printer package you prefer, or both if needed. The last one installed will be your default printer.
mlatino@m228-a:~/Downloads$ sudo dpkg -i uamath-konica401-pc_1.5_all.deb
(Reading database ... 325711 files and directories currently installed.)
Preparing to unpack uamath-konica401-pc_1.5_all.deb ...
Removing Konica Minolta bizhub 364e in Room 401
Unpacking uamath-konica401-pc (1.5) over (1.5) ...
Setting up uamath-konica401-pc (1.5) ...
Installing Konica Minolta bizhub 364e in Room 401
mlatino@m228-a:~/Downloads$
If your username does not match your netid, add a CUPS_USER variable to your .profile, e.g.:
export CUPS_USER=bobburton
Congratulations, you have added the PaperCut printer(s)!
Troubleshooting:
If it appears that the job was sent to the printer, but no jobs print out when you log in at the printer you should check this setting:
After you choose print, look at the advanced tab in the print options window. Make sure user authentication is not set up. The new system does not require it.
4.5. Using the Card Reader on the Konica Minolta Printer/Copiers
You can use your CatCard to access the Konica Minolta Printers in ENR2 third floor and Math 401. However, it must first be associated with your Math account (account information you use to login to gmail.math.arizona.edu).
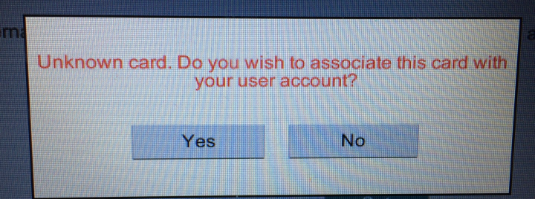
1. Swipe your CatCard in the card reader. (You may have to do this twice if the printer is asleep).
You will see this message. Touch Yes.
2. Next you will enter your Math username and password using the keyboard or the keyboard on the touchscreen.
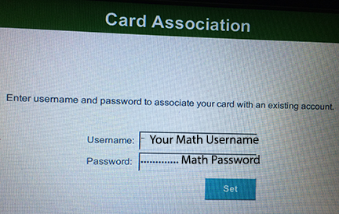
3. Click Set
4. You will have to scan your CatCard one more time to release your print job.
This was a one time set up. From now on you will only need to swipe your CatCard to release print jobs, make copies, etc.
4.6. Checking your print quota on the Konica Minolta Printer/Copiers
You can check how many print jobs you have left in your quota.
- While on the Math network, go to papercut.math.arizona.edu:9191
- Log in with your Math username and password.
- You will see information about your print jobs.
4.7. Printing from the M401-B Public Windows Computer
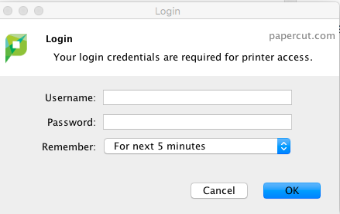
If you want to print from the public Windows computer in Math 401, you need to log in to the PaperCut server using your Math username and Math password. After you choose to print something, you should see a window that looks like this:
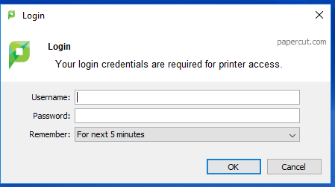
Log in with your MATH username and password.
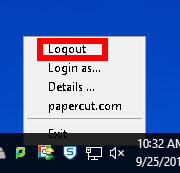
PaperCut will log you out automatically after 5 minutes. If you wish to log out sooner:
RIGHT-CLICK on the PaperCut icon on the lower right and choose "Logout."

4.8. Cancel your print job submitted to the Konica Minolta Printer/Copiers
You can cancel your print jobs by logging into the papercut server, follow these steps before swiping your catcard or logging into the printer.
- While on the Math network, go to papercut.math.arizona.edu:9191
- Log in with your Math username and password.
- Select Jobs Pending Release, Select Cancel below Action column.

4.9. Printing from the public iMac (Kingham) in Math 401 N
After you choose to print a document, you should see this:
Click Print.

Next you should get a Login message from Papercut. Log in with your MATH username and password.
This leaves you logged in to the printer for 5 minutes. If you would like to log out sooner, control-click on the PaperCut icon at the top right of the screen and log out.

4.10. Scanning to Google Drive from KM-ENR2 and KM-401
We have upgraded our PaperCut Software and you can now send your scan jobs to your Math Department Google Drive Folder.
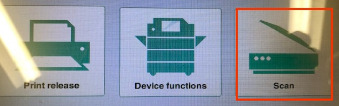
Log in to the copier by swiping your CatCard or using the keyboard. Choose Scan.
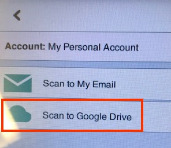
Choose Scan to Google Drive.
Change the settings if you don't like the defaults, otherwise click Start
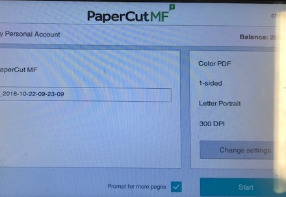
The machine will scan the documents. If you have pages to add, click New Scan Document. Otherwise click Send to upload the file to Drive.
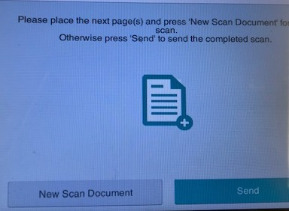
Be sure to logout when you are finished

NOTE:
The first time you scan, you will receive an email from PaperCut
asking you to login to Google Drive for authorization. When you click
on the link, you will get to a screen like this:
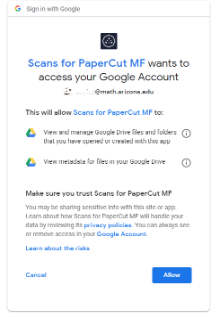
Click Allow. Papercut will create a folder inside your Google Drive called "Scans for Papercut MF"
5. Google Apps
5.1. How do I know if I am using Backup and Sync from Google?
These instructions are for Windows 10.

- If you don't see it right away, click on the up caret

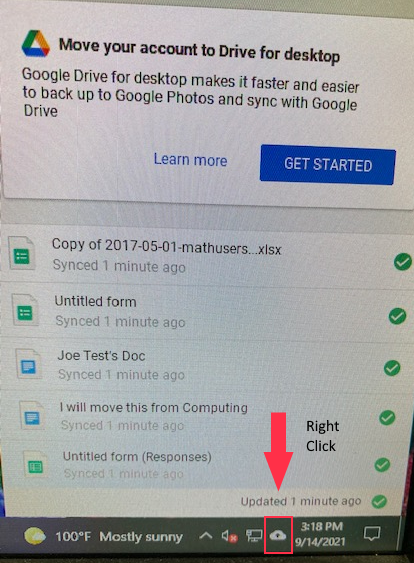
- If you see the cloud symbol, then you know Backup and Sync is installed. BUT, you may not be actually using it. You can check if you are logged into the Backup and Sync app. Hover your cursor over the cloud symbol.
- If you see the following "not signed in" message, then you are NOT logged into the app and NOT syncing files.
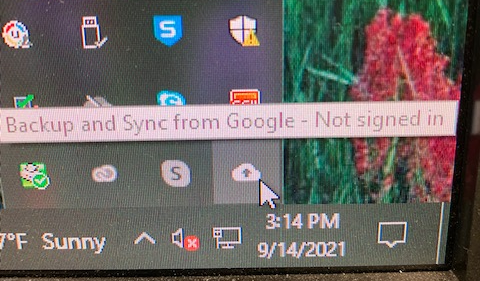
- If you see anything like the following two images, then you ARE logged in and using the app.


If you are not using it, you will eventually be prompted that it is not supported and asked to remove it. If it is a department machine and needs an admin login for removal, email system@math.arizona.edu
If you are using it, it is time to switch to Google Drive for Desktop. Right-click on the cloud symbol as shown above. Choose Get Started and refer to this article: https://www.math.arizona.edu/support/kb/ITSupport/index.php?pg=kb.page&id=495
5.2. Setting Up Google Drive for Desktop to Replace Backup and Sync
If you have determined that you are using Backup and Sync from Google (See this article for more info: https://ua-math-dept.helpspot.com/ITSupport/index.php?pg=kb.page&id=494 ) and need to switch to Google Drive for Desktop, follow these steps. (These are for Windows 10)
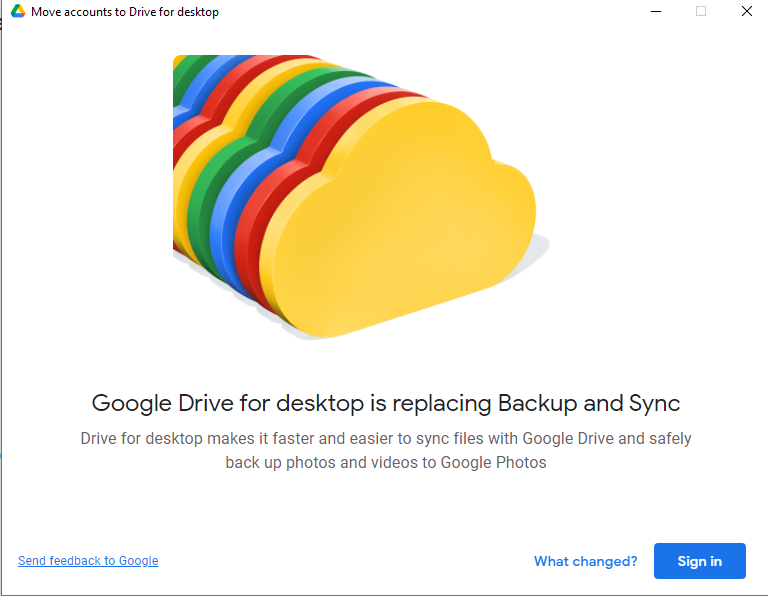
- Right click on the Backup and Sync Cloud symbol and choose Get Started
- Sign in with your @math.arizona.edu and corresponding password
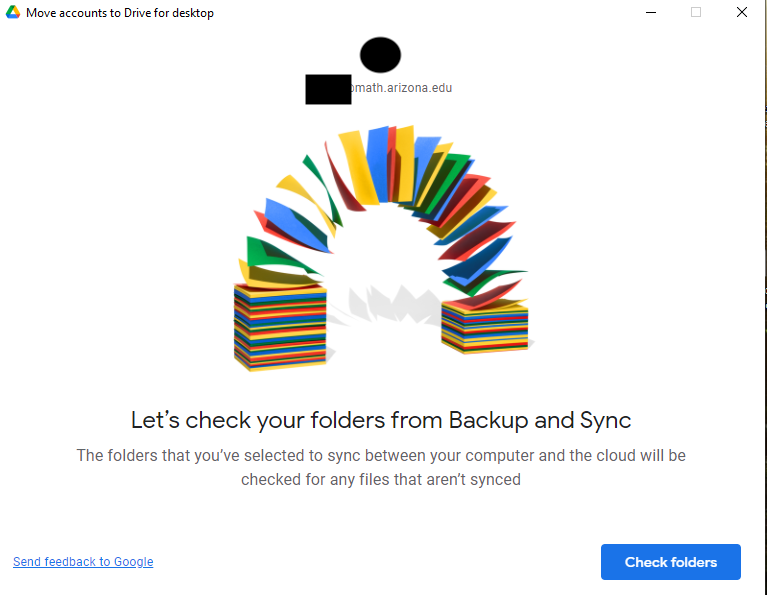
- It will proceed to check for folders that were backing up or syncing in the current system.
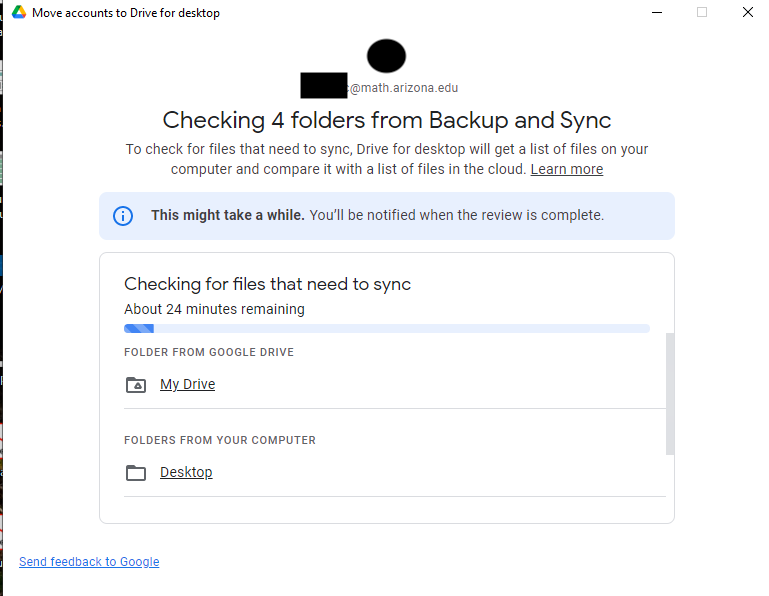
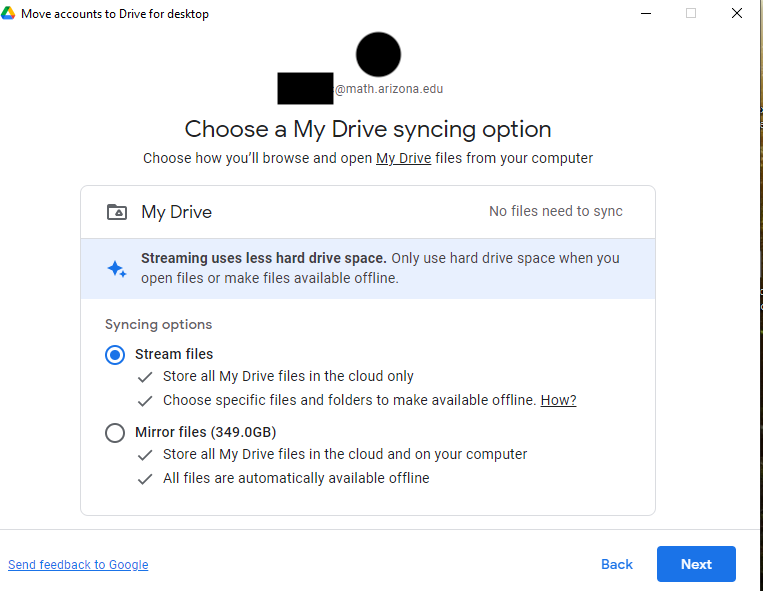
- This next step is important. The "My Drive" it is referring to is your Google Drive (in the "cloud"). When you go to drive.google.com in your web browser, it is here:
- This is potentially a lot of files. You probably don't want to have a duplicate copy of them on your local hard drive. Therefore, in the next step you should probably choose Stream
- Here is some more info on the difference between Stream and Mirror:
- When you mirror files, all of your My Drive files are stored in the cloud and on your computer, which takes up hard drive space. All of your files will be accessible at any time, even when you don’t have an internet connection or the Drive for desktop app running. Files can be accessed through a folder on your computer.
- When you stream files, your My Drive files are stored in the cloud. Hard drive space is only used when you open files and make them available offline. Files that are not available offline can only be accessed when you’re connected to the internet. All files, including those available offline, can be accessed only when the app is running. Files can be accessed through a mounted drive on your computer.

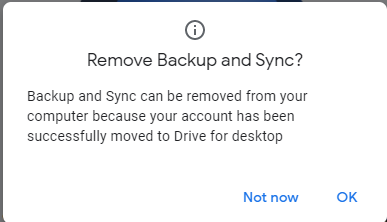
- When it is done it will prompt you to remove Backup and Sync. Click OK.
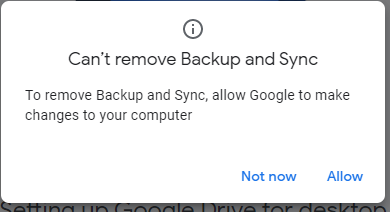
If you do not have admin rights on your computer you will see the following. If the computer belongs to Math, email system@math.arizona.edu and we will remove it for you.
Now what?
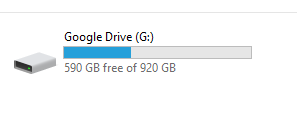
- Now when you look at This PC
 , you will see a letter drive (probably G:). This is a stream of your My Drive files. They are still in the cloud. You will need to be on the internet to access them.
5.3. Google Apps for Education - Math
Note: Math Google Apps for Education will be retiring Summer 2024
In 2015, Mathematics began using Google Apps for Education (Gmail, Calendar, Sheets, Docs, Groups, Sites, etc). Here are some helpful hints:
New to Google Apps? Also check out Google's App Learning Center for step by step instructions!
Gmail
Sites
Groups
Groups are useful as mailing lists.
Information on the pre-set Department mailing lists is here.
Google Drive
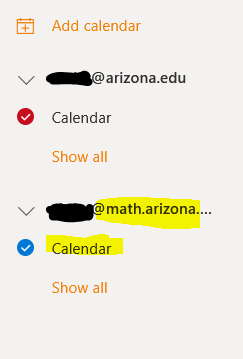
5.4. Add your Google Calendar to an Outlook Calendar
Here is how to add your Math Google Calendar to your UAConnect Outlook Calendar.
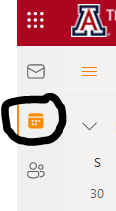
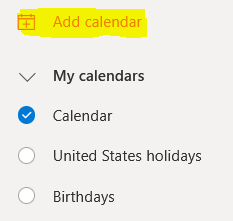
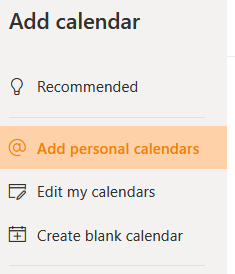
- Choose Add Personal Calendars

- You will be prompted to sign in to your Google account. Log in using your @math.arizona.edu address and your Math password. Choose "Allow"

- It should default to "Include my work availability" which means that other UArizona people on UAConnect will be able to view your time as free or busy, but not see the actual events.
- Click on the X at the top right.
- Your Math Google Calendar should now appear in the list on the left.
5.5. Transfer Files or Email to another Google Account
Go to:
https://myaccount.google.com and sign in with your Math GSuite credentials
On the left click on Data & Personalization
Click Start Transfer under Transfer Your Content
The
steps will take you through transferring all files in your Google Drive
and/or your Gmail messages. This will copy and transfer -- the
original files will stay in your Math GSuite account.
More information is available here: https://support.google.com/accounts/answer/6386856?visit_id=636807545617692260-3194481195
5.6. Classic Sites Move to New Sites
If you try to access a website you made in Google and get a message like this:

Then you need to Publish the New Site that was created when Google retired Classic Sites.
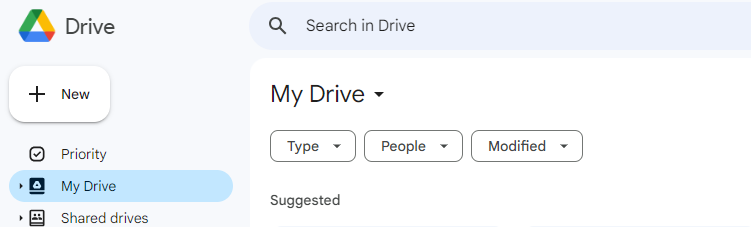
- Choose Sites from the Type Menu
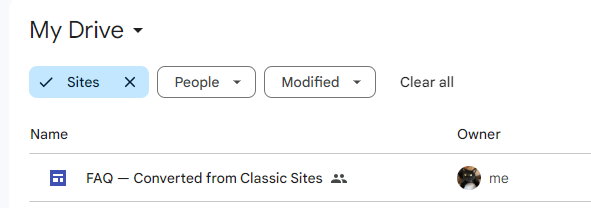
- Open the Site and click on the Publish Button.
- Choose "Use Existing site address"
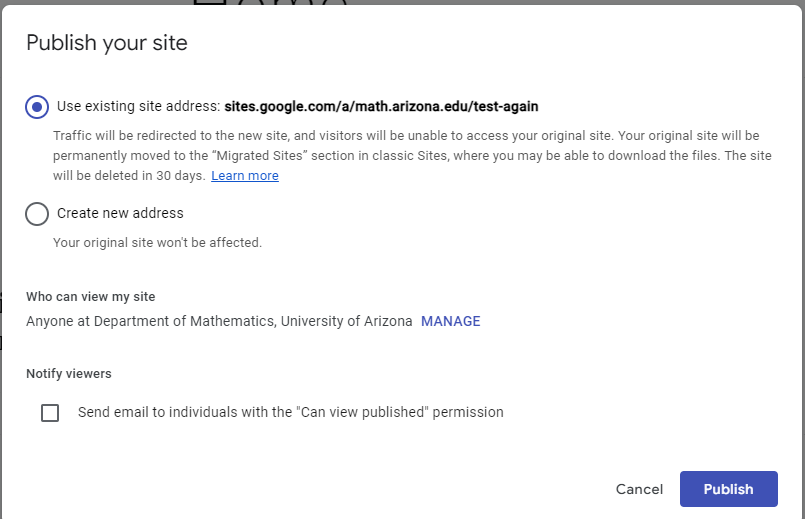
- Check that links to your website now go to the New Site
- If you run into any problems contact system@math.arizona.edu
6. Webpages
6.1. Change your Profile and Office Hours Information on our Website
Profile Page
Our website lists Department personnel in the People menu. A profile page is generated for each individual that looks similar to this:
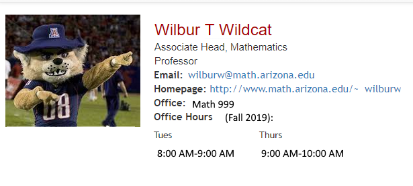
You can change some of this information. Please note that some items will be different depending on whether you are faculty, staff, or student.
STEP ONE: In a web browser, go to https://omicron.math.arizona.edu/profile/. Log in with your UANetID and corresponding password.
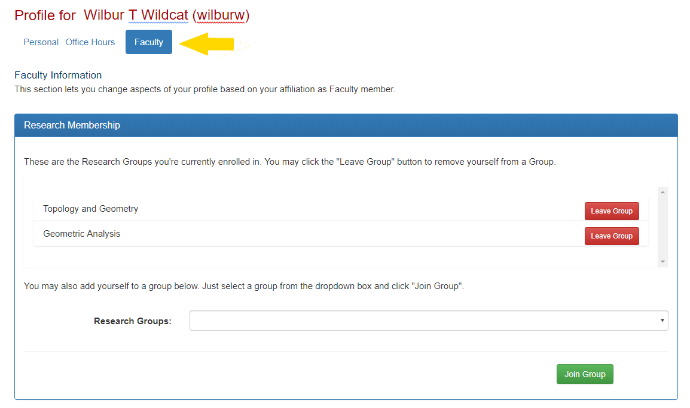
Research Groups
When the word Faculty is highlighted, you will see an interface that allows you to add or remove your affiliation with our research groups. This will change the information on the http://math.arizona.edu/research pages.
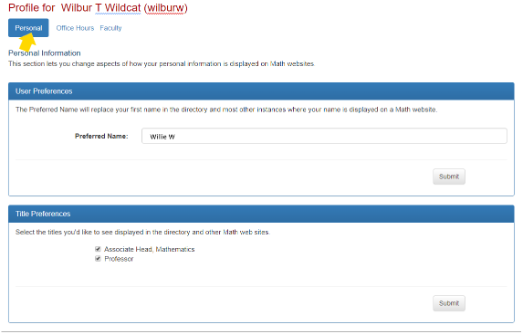
Preferred Name, Title, and Zoom Information
If you click on the word Personal at the top of the page, you will be able to edit your preferred name and University of Arizona titles. This affects the information listed in our directories in the People menu. Position titles are pulled from the University database. If you feel your title(s) are incorrect, please contact the Business Office.
NEW! If you would like to publish your personal Zoom room information, put it here under Zoom Preferences.
This information will only be visible by a person logged in with UA NetID.
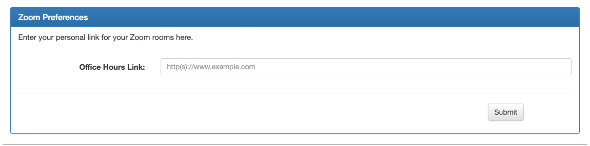
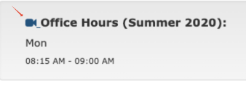
The red icon over the Zoom Link icon indicates that the viewer is not logged in via NetID. If they click on the icon they will be prompted to log in
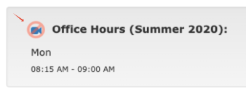
Now that the person has logged in, they will be able to click on the Zoom icon and it will take them directly to the Meeting Room.
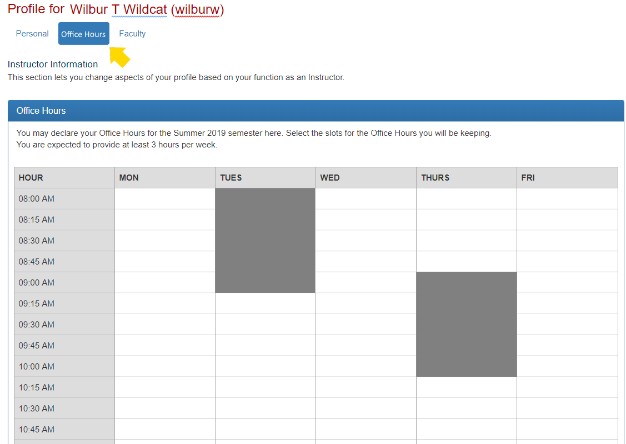
Office Hours
If you click on Office Hours you will be able to submit your Office Hours schedule.
- Click on the squares you wish to mark as office hours.
- At the bottom you may put Additional Notes. You may put your Zoom meeting link there, however it will be visible to the public. If you prefer, you may put your Zoom personal meeting link in under your personal profile page (see above). The zoom information submitted this way will only be visible to UA NetID holders.
- Click on the Submit Office Hours green button when done.
Your office hours will now appear in your profile. Go to https://www.math.arizona.edu/people and click on your name to see them.
Note: Preferred pronouns are pulled from the University database. If you wish to change them, follow these instructions:
You can add, remove, or update your pronouns by following these steps:
- Log in to UAccess Employee and select the UA Employee Main Homepage.
- Click on the Personal Information tile.
- Select "Gender and Pronouns" from the menu on the left.
- Choose your pronouns from the dropdown menu and click "Save."
For those who are both employees and students, you may add, remove or update your pronouns in UAccess Employee and/or UAccess Student. The phonebook will display from the system that was most recently updated.
6.2. Create a Personal homepage
Faculty - please check out Arizona Faculty Sites if you would like to build a homepage or a page for your research group/conference https://sites.arizona.edu/
Grad Students - You can create a Google Site, either using the Math Google Workspace for Education or the University's Google Workspace for Education. However, the Math Workspace will be retired in Summer 2024 and you will lose access to the UA Workspace (except for email) upon graduation. An alternative to look at is https://www.owlstown.com/
Google Sites instructions:
https://support.google.com/sites/answer/6372878?hl=en&ref_topic=7184580
7. Remote Access to Math Accounts
7.1. Remote Access
There are three different types of remote access supported by the Department of Mathematics:
-
Mathematics Virtual Private Network (VPN)
The
Mathematics VPN allows you to access restricted Math resources (as well
as many campus-only resources) when you are not in a Math building. For
example, if you need access to the Mathematics Intranet pages, you
could use the Mathematics VPN to gain access to them.
-
Remote Desktop (VNC)
Using
remote desktop, you can connect to a virtual Linux desktop from your
Windows, Mac OS, or Linux-based computer. You can even connect from a
tablet such as an iPad!
-
Shell Access (ssh)
Shell
access provides you with text-only access to your account. This is a
great option for those who simply want to run programs or scripts from
the Linux command line.
7.2. UA VPN for Math Dept
This is a special configuration of the UA VPN for the Math Department.
Downloading and Installing
Laptops issued by the Math Department should already have the Cisco Anyconnect Client installed.
If you have the client, you can skip to Connecting.
Please see this article for client download and installation instructions:
https://servicenow.arizona.edu/sp?id=kb_article_view&sysparm_article=KB0011701
Please see below for Connection instructions. These are unique to our department version of the VPN.
Connecting: Windows
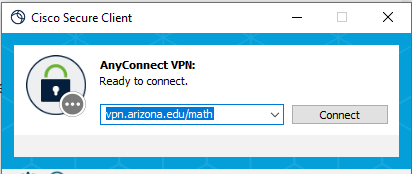
1. Click the Start Menu and find Cisco Secure Client
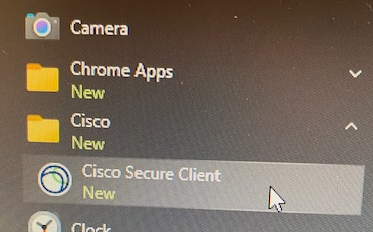
2. In the Ready to Connect window that launches, type in vpn.arizona.edu/math and click Connect (with future connections, this information should persist)
3. In the login box:
- Enter your NetID
- Enter your NetID Password
- For the Second Password option, type the NetID+ Method you selected when you enrolled in NetID+ (push, sms or passcode)
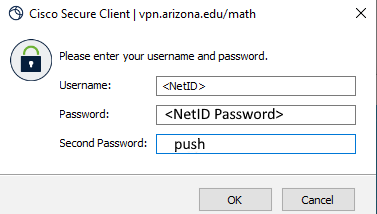
4. Click OK and respond to your second password prompt (Duo Push, SMS text, or passcode)
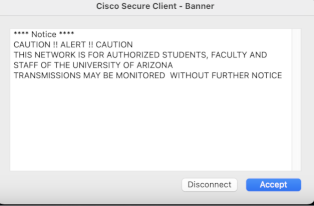
5. Review the Notice box and click Accept to clear the notice alert
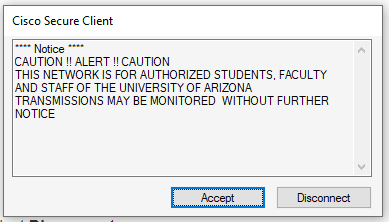
You are now connected!
6. To verify, look for the small Cisco AnyConnect icon in the task bar.
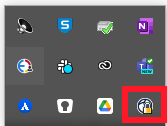
7. To disconnect, double-click this icon and select Disconnect.
Connecting: Mac
(requires Mac OS 11 or higher)
Navigate to your Applications folder
1. Locate the Cisco folder and open it
2. Double-click the Cisco Secure Client app
3. In the Ready to Connect window that launches, type in vpn.arizona.edu/math and click Connect (with future connections, this information should persist).

4. In the login box:
- Enter your NetID
- Enter your NetID Password
- For the next option, type the NetID+ Method you selected when you enrolled in NetID+ (push, sms or passcode)
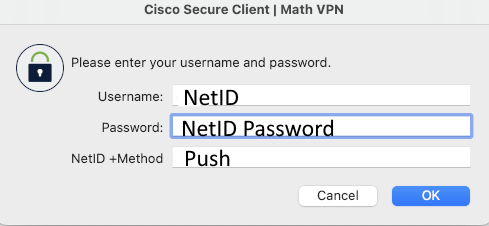
5. Click OK and respond to your second password prompt
6. Review the Notice box and click Continue to accept the notice alert
7. You are now connected! - Look for the small Cisco AnyConnect icon on the top menu bar.
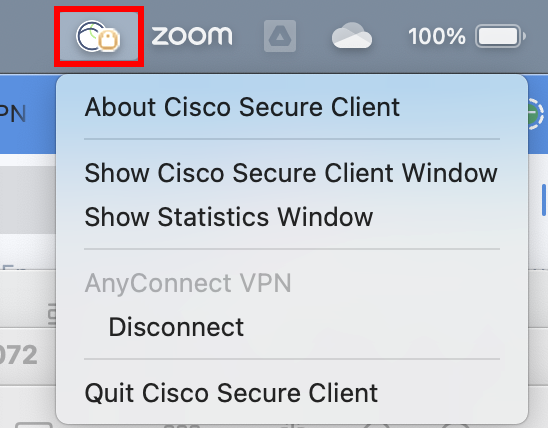
8. When are ready to disconnect, click on the icon and choose Disconnect from the menu.
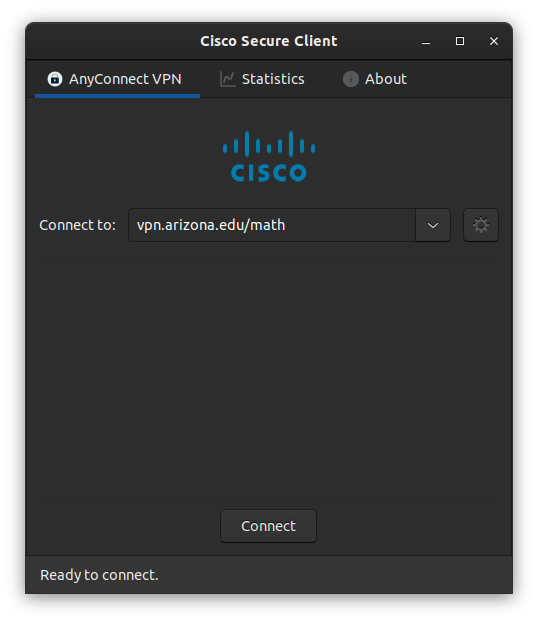
Connecting: Linux
Navigate to your Applications menu
- Double-click the Cisco Secure Client app
- In the window that launches, type in vpn.arizona.edu/math and click Connect (with future connections, this information should persist)
- In the login box, enter the following information
- Enter your NetID in the username field
- Enter your NetID Password in the password field
- For the next option, type the NetID+ Method you selected when you enrolled in NetID+ (push, sms or passcode)
- Click OK and respond to your second password prompt
- Review the Notice box and click Continue to accept the notice alert
- You are now connected! - Look for the small Cisco AnyConnect icon on the top menu bar
7.3. Mathematics VPN -- Virtual Private Network
The Mathematics VPN allows you to access restricted Math resources when you are not in a Math building using the Math wired ethernet. For example, if you are at home and establish a connection to the Math VPN, you will be able to get to the Office Hours submission page. Additionally, you will be able to get to most U of A resources that require the UITS (University) VPN. For example, UAccess Instructor will be available for you while you are connected via the Math VPN. Do not attempt to use the UA VPN and Math VPN simultaneously.
Math VPN Setup Instructions:
7.4. VNC - Remote access and control of your Linux Desktop Environment
Note: 9/2014 - Due to the new version of Ubuntu (14.04) on our gateway machines and servers, you may need to update a file so that your vnc desktop will appear properly. If you have a problem viewing your desktop: 1) Kill your vncserver process, 2) In your ssh terminal window, remove the following file: ./vnc/xstartup (i.e. rm ~/.vnc/xstartup) 3) Restart the vncserver.
What is VNC?
VNC stands for "Virtual Network Computing" and is a type of "remote desktop" software. VNC lets you access to a Linux desktop running on a Math server in a window. This desktop is called a "VNC server." It will run until it is killed. You connect to or "view" your personal virtual desktop from a "VNC client". You can disconnect and the desktop will continue to run. You need "VNC client" software on your Mac OS X, Windows, Linux machine or tablet to use this service. (See www.realvnc.com and at www.tightvnc.com for VNC clients.)
Our VNC Gateways: Phoenix (grad students) and Dragon (faculty) provide graphical access to your network account desktop from anywhere on the internet.
Since the gateways have many users, Please run computational software(e.g. Matlab) on the chivo cluster for graduate students, or on faculty desktops instead of on the gateways.
1. Set up your VNC Service
Before you can connect, you must setup your VNC service.
2. Connect to the VNC Service
2.1 Create a virtual private network (VPN) connection
If you are connecting from off campus, you must first connect to the Math VPN, the UA VPN or use SSH Tunneling.
2.2 Installing the VNC Viewer
The VNC Viewer is a program you run on your local machine which connects to the remote VNC desktop so you can interact with it.
Windows and MAC
- Microsoft Windows VNC Viewer - TightVNC Viewer [Download]
- Mac OS X VNC Viewer - Chicken of the VNC [Download]
Linux
- If you are connecting from a linux computer, the vncviewer program should be pre-installed.
2.3 Connect the VNC viewer to the VNC server
Now you will connect to the remote VNC desktop you setup in step 1.
Launch the viewer (e.g. tightvnc.) For the host connection, use:
hostname.math.arizona.edu:59xx
Where "hostname" is the server you ssh'ed to and xx is the VNC number that displayed when you setup your VNC Service.
If you are connecting from a linux computer, VNC can be launched from the command line with the following command:
vncviewer hostname.math.arizona.edu:59xx
You will also be asked for the VNC password you created at that time. If you forgot the password you can reset it.
3. Disconnect from your VNC session
To disconnect from (i.e., stop viewing) your remote desktop, simply close the viewer (the outermost window).
There is no need to close individual windows inside your virtual desktop, nor is there a need to log out of the Gnome session inside your virtual desktop. (In fact, if you accidentally do this, then you must kill your remote desktop and create a new one.)
7.5. Setting Up Your VNC Service
-
The
following steps show you how to set up your own persistent VNC server
(i.e. remote desktop) which will run on a computation server or a VNC
gateway. When you are done with these steps, you will connect to the server to start a computation job or access your math network files.
Setup: starting up the VNC server
First you will create a VNC server (i.e. virtual desktop.) You can leave the VNC Server running for weeks or months. However, Please do not run multiple VNC servers on the same machine, or on multiple chivos.
- Pick a VNC host.
- For light work via VNC, we provide Phoenix (grads) and Dragon (faculty.)
- For heavy computation, faculty can use their office desktops, grad students can use the chivos
- Use
SSH to connect to the VNC host. You will need to maintain either a Math
VPN connection or a SSH Tunnel to the VNC host while using your vnc
viewer.
- For VNC via Math VPN ,
- First connect to the MATH VPN
- Then ssh to the machine (ssh to yourmathaccount@vnchost.math.arizona.edu) Replace vnchost with the machine you are connecting to (e.g. chivo, chivoX, yourdesktopname, dragon or phoenix.)
- For VNC without Math VPN you will instead create an SSH session w/ Tunneling.
- Use the command vncserver on the VNC host to create your remote desktop. The command will display the number of your new VNC server. EG: ":7", or ":13". You must remember that number! (Advanced users can specify additional options to vncserver. See the bottom of this page for information.)
- Your remote desktop is now alive! You can use a VNC viewer to connect to your remote desktop.
- You
will be prompted to set a vnc password the first time you create a
session. You will need to use this password every time you connect. If
you ever forget this password, you can reset it.
Setup: starting up the VNC server on Ubuntu 16.04 (e.g. the grad chivos).
VNC
server configurations that work on older versions of Ubuntu may not
work on Ubuntu 16.04. If you start your VNC client and see nothing but a
grey screen after connecting to the VNC server, follow these
instructions to fix the problem.
- Decide
whether you want an xfce4 or a gnome desktop. The gnome desktop will
probably look more familiar, but the xfce4 desktop will be faster and
more responsive.
- If you decide to try the xfce4 desktop, backup your current ~/.vnc/xstartup file and replace the contents with this:
#!/bin/sh

startxfce4 &
-
- If you decide to stick with the gnome desktop, backup your current ~/.vnc/xstartup file and replace the contents with this:
#!/bin/sh

export XKL_XMODMAP_DISABLE=1
unset SESSION_MANAGER
unset DBUS_SESSION_BUS_ADDRESS

gnome-panel &
gnome-settings-daemon &
metacity &
nautilus &
gnome-terminal &
After updating your xstartup file, make sure execute permissions are set on it:
bobburton@chivo:~/.vnc$ ls -ld xstartup
-rwxr-xr-x 1 bobburton users  24 Feb 13 10:35 xstartup
Kill your current VNC server process if you have one:
bobburton@chivo:~/.vnc$ ps -ef | grep vnc | grep bobburton
bobburt+ 24506 1 0 08:57 pts/8 00:00:00 Xvnc4 :2 -desktop chivo:2 (bobburton) -httpd /usr/share/vnc-java -auth /u5/bobburton/.Xauthority -geometry 1024x768 -depth 16 -rfbwait 30000 -rfbauth /u5/bobburton/.vnc/passwd -rfbport 5902 -pn -fp /usr/X11R6/lib/X11/fonts/Type1/,/usr/X11R6/lib/X11/fonts/Speedo/,/usr/X11R6/lib/X11/fonts/misc/,/usr/X11R6/lib/X11/fonts/75dpi/,/usr/X11R6/lib/X11/fonts/100dpi/,/usr/share/fonts/X11/misc/,/usr/share/fonts/X11/Type1/,/usr/share/fonts/X11/75dpi/,/usr/share/fonts/X11/100dpi/ -co /etc/X11/rgb
bobburton@chivo:~/.vnc$ vncserver -kill :2
Killing Xvnc4 process ID 24506
bobburton@chivo:~/.vnc$
Restart the VNC server:
bobburton@chivo:~/.vnc$ vncserver -geometry 1680x1000 -depth 24
Found /usr/share/vnc-java for http connections.

New 'chivo:2 (bobburton)' desktop is chivo:2

Starting applications specified in /u5/bobburton/.vnc/xstartup
Log file is /u5/bobburton/.vnc/chivo:2.log

bobburton@chivo:~/.vnc$
How to reset your vnc password
Use ssh to connect to any networked linux machine (e.g. phoenix, dragon or a chivo) and enter the command "vncpasswd." You will be prompted for a new password.
How to figure out your desktop number
If you've forgotten your desktop number, you can connect to the VNC host via ssh then issue the command:
ps -ef | grep vnc | grep myusername
How to permanently kill your remote desktop
To
kill your remote desktops, first use SSH to connect to the VNC host, as
described above. To kill a particular desktop, for example desktop
number 7, use the command:
vncserver -kill :7
To kill all your desktops at once, use the command:
killall Xvnc4
You can ignore any "Operation not permitted" error messages.
Advanced VNC Hints
- The
simpler the graphics on your desktop, the less information needs to be
transferred, and the faster your VNC connection will be.
- Change your desktop background color to a solid color. Use solid white or solid black.
- Simplify
your desktop theme to one that uses rectangular windows, and uses a
solid color (as opposed to gradient shading) for controls, window
titles, etc.
- Turn off any graphics, like moving charts or eyeballs that follow the mouse cursor...
- To make VNC it as fast as possible you can use a smaller desktop, and use fewer bits per pixel. For example: vncserver -depth 8 -geometry 800x600.
- When you create your VNC server with the command vncserver,
you can use a different resolution and/or color depth. You can match
your vnc screen resolution to that of your home computer and run your
VNC viewer in fullscreen mode.
- For
example, say your Windows box at home has a display resolution of
1280x1024 at 24 bits/pixel. (To see this information, right-click on the
background of the desktop and bring up Properties.)
- When you create your VNC server, you could use the command vncserver -depth 24 -geometry 1280x1024. (see "man vncserver" for more info.)
- When
you connect from your Windows box, right-click on the titlebar of the
outermost VNC window and select "Full Screen". It will tell you the
keystrokes to escape from full-screen mode.
- At
this point, instead of seeing Linux inside a VNC window inside
Microsoft Windows, all you see in front of you is your remote Linux
desktop!
- Please disable
the screensaver on your remote desktop. (Otherwise your virtual desktop
will use too many CPU cycles "saving" a non-existent screen.) On our
remote desktop gateways, the screensaver has already been disabled - but
if you run a VNC server on some other computer, then the first time you
connect to your remote desktop, disable your X screensaver (go to
Start/Programs/Settings/Desktop/Screensaver).
connect to the server
7.6. Alternatives to VNC
VNC is overkill for many applications.
If you're running Matlab or Mathematica on a Linux server, you don't
need to replicate your Linux desktop on your local computer--it's
sufficient to just open the windows required by the application.
This
can be accomplished by running an X server on your local computer and
connecting to the Linux server with secure X11 forwarding enabled. This
can be done from Windows, OS X, or Linux clients. The following
instructions were plagiarized from https://uisapp2.iu.edu/confluence-prd/pages/viewpage.action?pageId=280461906. If you are not in a Math building using the Math wired ethernet, connect to the Math VPN before starting.
Windows
- Install the Xming software.
- If you have not already done so, download putty.exe from the PuTTY site and install it.
- Run
Xming on your PC to start the X server. You should see the Xming icon
in the taskbar if it is running (although you may have to click the
little arrow in the taskbar to see it)
- Run PuTTY and set things up as follows:
- Enter the server name (e.g. chivo.math.arizona.edu) in Host Name
- Make sure the Connection type is set to SSH
- Enable X11 forwarding (Connection > SSH > X11)
- Log in with your Math username and password.
- Once
you are logged into the linux system, you can just run the GUI program
of your choice (ie. Matlab, Mathematica, etc) from the command line and
it will display on your PC.
Mac OS X
- Install XQuartz on your Mac, which is the official X server software for Mac
- Run Applications > Utilities > XQuartz.app
-
Right
click on the XQuartz icon in the dock and select Applications >
Terminal. This should bring up a new xterm terminal windows.
- In
this xterm window, ssh into the linux system of your choice using the
-Y argument (secure X11 forwarding). For example, to log into
chivo.math.arizona.edu you would run something like:
ssh -Y username@chivo.math.arizona.edu
- Once
you are logged into the linux system, you can just run the GUI program
of your choice (ie. Matlab, Mathematica, etc) from the command line and
it will display on your Mac.
Linux
- Ssh
into the linux system of your choice using the -Y argument (secure X11
Forwarding). For example, to log into chivo.math.arizona.edu you would
run something like:
ssh -Y username@chivo.math.arizona.edu
- Once
you are logged into the remote linux system, you can just run the GUI
program of your choice (ie. Matlab, Mathematica, etc) from the command
line and it will display on your linux client.
7.7. Remote Shell Access to Your Network Account
Our shell gateways, reachable worldwide from anywhere on the internet, provide text-only shell access to your network account. (Once on the gateway, you can also connect to other machines in our building network.)
- Faculty/visitor/staff shell gateway: ssh -p 31415 dragon.math.arizona.edu
- Graduate student shell gateway: ssh -p 31415 phoenix.math.arizona.edu
You use ssh to connect to our shell gateways.SCP, and SFTP are also used to transfer files between your network account and other systems.
Your SSH program uses port 22 by default. You will need to set it to use port 31415 when you are not in a Math building.
Please never run
heavy-duty computations directly on the shell gateway. If you are
running a compute job you should ssh or VNC to another machine (such as
your office desktop, or the chivo cluster for graduate students)
Different ways to connect to the shell gateway:
Gateway authentication:
To
verify that you are not being duped by a rogue gateway, the first time
you try to connect you will be presented with the gateway's RSA or DSA
key fingerprint. The correct fingerprints are:
dragon (RSA): ec:0d:8f:56:ff:60:cc:99:69:81:72:13:e8:c7:08:e2
dragon (RSA/Babble): xipod-ryzem-tefud-nevip-nudef-zinoc-mycyk-gucam-kohiz-pucam-boxex
dragon (DSA): 8f:4c:ca:06:1c:85:91:6c:60:b5:1f:05:50:8c:69:f5
dragon (DSA/Babble): xohon-nacyv-vivyb-tizuh-debem-narek-sipam-begin-fasys-zades-gaxux

phoenix (RSA): da:7d:51:4e:b9:32:72:e9:ce:65:a5:cf:25:02:56:69
phoenix (RSA/Babble): xifel-kobid-lyrur-zazod-topaz-doniz-vogyh-bubug-malip-lyfym-toxux
phoenix (DSA): f2:0a:b9:9e:3a:33:7a:cc:0e:ff:c6:18:97:70:b3:29
phoenix (DSA/Babble): xukit-nilor-sybyf-firyz-lonez-tored-teban-kuryd-suhez-davyf-luxix
7.8. Running software remotely or in the background
Introduction
If you're doing heavy-duty computation with Matlab/Maple/Mathematica or your own programs, you may have to wait a long time (perhaps days) for your computation to finish. Since you don't want to sit in front of a lab computer for days, or tie up your office computer, you can put tasks in the background, and/or put them on a remote machine. You can then log out and return later to get your results, Note that it is very easy to take up too much CPU time or memory with a background computational process. The "chivos" are dedicated to this purpose for grad students.
Commands
Before launching background/remote tasks, you must:
- Learn to use ssh to connect to remote systems.
- Learn to use top or ps, kill, and renice to monitor and manage processes you've started.
- Learn to use &, nice, nohup, and ulimit to launch processes in a desired way.
- For interactive (non-batch) programs: know about ssh -Y, and learn either vnc or screen.
You can type "man command" to get more information on any of these commands. This article also gives a nice overview.
- top
-
top displays a list of active processes, how much memory and CPU time each process is using and who owns it, etc. If a machine is sluggish, top will tell you why! From within the topdisplay, you can kill or renice your running processes. Hit ? for some help, and read the manpage: man top. (If you spot someone else's runaway process eating too much CPU, you can email system or the other user . They might not know about it unless you inform them.)
- ps
-
Makes a list of running processes along with additional information. A common invocation isps -aux, which lists a lot of extra information. Another useful invocation is ps -aux -forest, which draws lines to indicate which process spawned which process. (The commandpstree is similar.)
- kill
-
Lets you kill one of your processes. You must know the numeric process ID. You can see the PID in the top display, or you can get a list using ps -aux. Instead of using kill as a separate command, you can access it inside top. Read man kill for more info. Generally you can first send a "kill 15 xxxxx" (where xxxxx is the process ID) and wait a few seconds. If the process does not die, do a "kill 9". If that doesn't work, then that machine has become unstable and you can contact the computer support staff.
- nice
-
This starts a task with a nice value, which means the task will do a better job sharing the CPU when you try to run other programs or when other users log in to the same computer. All heavy-duty tasks not running on chivos should be nice. Manpage: man nice.
- renice
-
Forgot to start something using nice? Use this to go back and make it nicer. You can also do this inside top. See: man renice.
- &
-
Putting this after a command puts that command in the background, so that you can continue to give other commands. If you log out, your background task might get killed automatically (to avoid that, see nohup). If the command creates windows (e.g., Mathematica &), it will create them even from the background. Most people use & when starting programs like Mathematica so that they don't lose their prompt. (Try it both ways and the previous sentence will make more sense.) See: http://en.wikibooks.org/wiki/A_Quick_Introduction_to_Unix/Job_Control
- nohup
-
To put something in the background so that it doesn't die when you logout, start it with nohup. (e.g. "nohup command &" ) This works with text-only programs. In other words, the "nohupped" command won't work if it tries to create windows, or needs keyboard input. The command must send all output to a file. You can use this with your own C/C++ programs, but you can't use it with most software packages. See: man nohup. screen does much more than nohup.
- ulimit
-
To prevent a program from using too much time or too much memory, you can set limits in a shell, and all programs started from that shell will have those limits imposed. Use ulimit -ato get a list of limits. To confirm you understand what is going on, set various values ridiculously low and try to run your program to make sure it gets stopped by the operating system. Then quit that shell, open a new shell, and set more reasonable limits. Go read man ulimit.
- screen
-
This creates an environment in which you can start an interactive text-only program, such as GAP or Macaulay, or even Mathematica in its text-only non-notebook mode, but you can log out and it keeps going. On any linux machine, e.g. chivo, enter screen, a "screen" process starts with a new prompt. Then you can enter a command, e.g: nice Singular, then type some Singular commands that will take days to complete, hit "control-A d" and log out. A day later you can ssh to chivo, do screen -r to reconnect, and you'll be right back in the Singular session. It's very cool. Type man screen on a linux machine for more information.
ssh
From within a shell, you can use ssh user@remote to obtain a shell on a remote system. Then you can issue commands (such as many of the ones described on this page) on the remote system. If you use ssh -Y user@remote then there will also be interactive X forwarding, meaning that programs launched on the remote system can open windows on your local system (assuming you are logged in to a graphical X desktop). You might also want to read about using ssh to obtain remote shell access to your network account.
VNC
This is a graphical version of screen. You can create an entire virtual X desktop and connect to it from home, office, anywhere you can access a web browser. You'll have to read man vncserver and man vncviewer. You might want to read about using vnc to obtain remote desktop access to your network account.
7.9. Transferring Files To/From Your Network Account
Our shell gateways can be used to transfer files to/from your network account.
Technically speaking, our shell gateways speak SSH, SCP, and SFTP. To use RSYNC, layer it over SSH: rsync -e 'ssh -p 31415' ....
When connecting from outside the department, you must connect on port 31415.
To connect and transfer files:
- If you are running Microsoft Windows you can use WinSCP. [Download]
- If you are running Mac OS X we recommend Fugu. [Download]
- Alternatively, if you are running Linux or Mac OS X, you could instead invoke scp directly from the command line to transfer individual files:
scp -P 31415 localfilename myaccountname@dragon.math.arizona.edu:newremotefilename
scp -P 31415 myaccountname@dragon.math.arizona.edu:remotefilename newlocalfilename
To transfer many files, you may want to instead enter an interactive SFTP session:sftp -oPort=31415 myaccountname@dragon.math.arizona.edu
(You will need to know how to use SFTP commands.)
Gateway authentication:
To verify that you are not being duped by a rogue gateway, the first
time you try to connect, you may be presented with the gateway's RSA key
fingerprint. The correct fingerprints are at the bottom of our page on remote shell access.
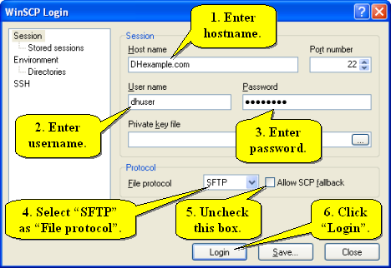
7.10. WinSCP for File Transfer
After you open WinSCP you will see a login screen. The hostname will be dragon.math.arizona.edu for faculty/staff or phoenix.math.arizona.edu for graduate students. The port number of 22 is fine, unless you are not on the math network. In that case change the port to 31415
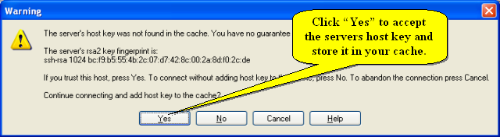
Next you might see a warning like the following:
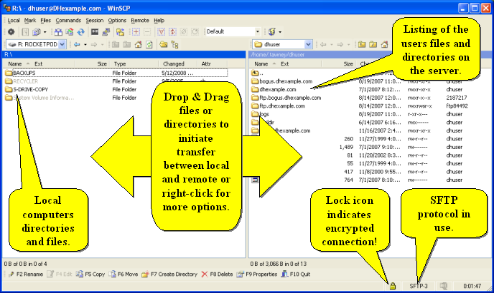
Finally you get to the transfer file window. You can drag and drop files from your computer (left side) to the server (right side). Files for your webpage should go into your pub_http_internet folder.
7.11. How to Use PuTTY to Connect to a Remote Computer
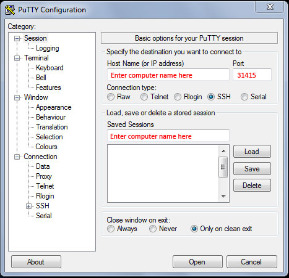
Start PuTTY by double-clicking its icon.

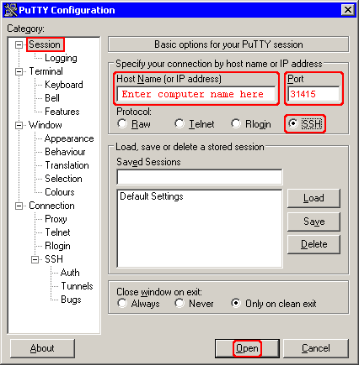
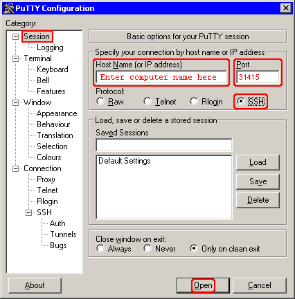
When a PuTTY Configuration window opens select Session (it should be selected by default) from the Category panel on the left. In the Host Name (or IP address) field enter the name of the computer you wish to connect to. In the Port field replace 22 (the default) with 31415. Make sure that SSH is selected under Protocol (it should be selected by default). Click on Open.
In the new dialog box enter your username and password.

Once you see the prompt, you are connected to the remote computer.

7.12. VNC via SSH Tunneling
How to create your remote desktop:
Before you can connect to your remote desktop, you must create your remote desktop service.
Different ways to connect to your remote desktop:
In the instructions below, wherever we write "bobcat", graduate students should substitute "iguana".
- If you are running Microsoft Windows you'll need both an SSH Client and a VNC Viewer.
- PuTTY - SSH Client [Download]
You'll need to make sure you have PuTTY setup for SSH Tunneling. - TightVNC Viewer [Download]
Note
that you only need the "Viewer", which is the smallest of the many
available downloads. To connect, first launch PuTTY and open the session
you created using the instructions above.
Then launch the viewer, and simply type "localhost" for the Remote
Host. If your SSH Tunnel is set up properly and connected, you will be
asked for the password you setup when you created your remote desktop
service.
- If you are running Linux or Mac OS X, you can create your SSH Tunnel directly from the command line:
ssh -L 5900:bobcat.math.arizona.edu:59xx -p 31415 bobcat.math.arizona.edu
where xx is your VNC desktop number.
- For Mac OS X, you can download the client "Chicken of the VNC".
While logged in with the previous command, you can run "Chicken of the
VNC" and enter "localhost" for the host and the password you setup when
you created your remote desktop service.
- For Linux, while logged in with the previous command, open a new terminal window, and enter the following command:
vncviewer localhost
How to disconnect
- To disconnect from (i.e., stop viewing) your remote desktop, simply close the viewer (the outermost window).
- There
is no need to close individual windows inside your virtual desktop, nor
is there a need to log out the Gnome session inside your virtual
desktop. (In fact, if you accidentally do this, then you must kill your remote desktop and create a new one.)
7.13. PuTTY - SSH w/ Tunneling
Start PuTTY By click on this icon:

You will be presented with the PuTTY Configuration window below.
Enter the name of the computer you're creating this connection for. An example would be "dragon.math.arizona.edu". Enter 31415 for the port. Then since we are creating a session we intend to re-use, enter the computer name in the Saved Sessions space as well. Once all that's entered click on the Save button to the right.
Next, click on the plus sign next to the words "SSH" on the left, then click on "Tunnels" from the items that appear below it. That should bring up a window that looks like this:
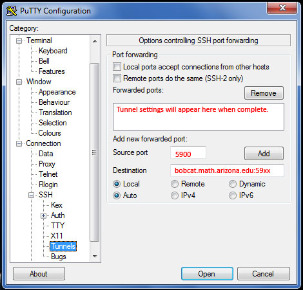
Enter the Source port of 5900 and the Destination as dragon.math.arizona.edu:59xx, where xx is your VNC desktop number. If you don't have one, you'll need to create your remote desktop service. Then click "Add" and make sure that your tunnel settings appear in the box above where you entered them.
Note: Graduate Students will use phoenix instead of dragon.
Next, you need to scroll the "Categories" box on the left back up and click on "Session". You'll be taken back to the first window. Click "Save" here again to save your Tunnel settings to the Session we've created.
Now you can simply click Open, and an SSH connection will be made with a Tunnel from your localhost to the Destination entered above. In the future, when you open SSH, you will be able to simple double click on the server name in the Saved Sessions window to open the connection.
7.14. Connecting to Math VPN - Mac OS Sierra and above
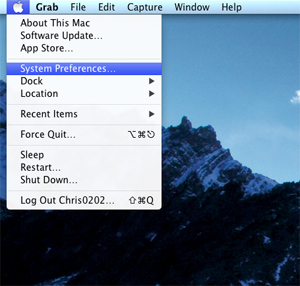
- Go to the Apple Menu and choose System Preferences
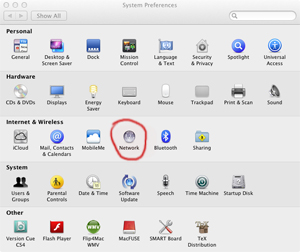
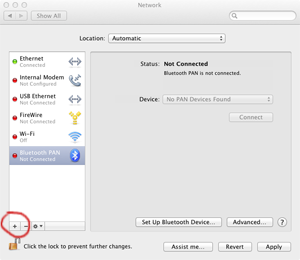
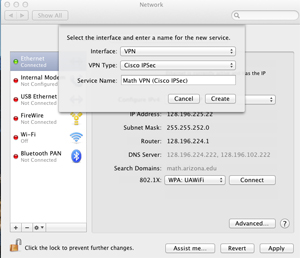
- Interface: chose VPN
- VPN: Cisco IPSec
- Service Name: Math VPN (Cisco IPSec)
- Click Create
- Click the Authentication Settings button
- Shared Secret can be found here
- Group Name is: Musers
- Click OK
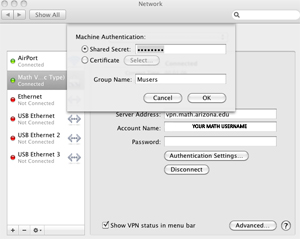
- Next fill in the following...
- Server Address: vpn.math.arizona.edu
- Account name: Use your math username
- Password: This will be your math password, you can leave this blank and it will ask for it later when you connect.
- Put a check in the box for Show VPN status in menu bar.
- Click Apply, and then Connect.
After set-up:
- You can still connect though System Preferences/Network, but it is easier to use the shortcut.
- In the upper right you should see an icon that looks like this:

- Click on it to see this menu:

- Choose connect
- When you are finished, you can also choose Disconnect from this same menu.
7.15. How to Use PuTTY to Connect to a Remote Computer
Start PuTTY by double-clicking its icon.

When a PuTTY Configuration window opens select Session (it should be selected by default) from the Category panel on the left. In the Host Name (or IP address) field enter the name of the computer you wish to connect to (such as dragon.math.arizona.edu or phoenix.math.arizona.edu). In the Port field replace 22 (the default) with 31415. Make sure that SSH is selected under Protocol (it should be selected by default). Click on Open.
In the new dialog box enter your Math username and password.

Once you see the prompt, you are connected to the remote computer.

8. Software
8.1. Antivirus & Malware
8.2. Logging in to Adobe Acrobat Pro DC for Windows
*These are Windows instructions. Mac instructions are here: Acrobat Mac Instructions
1. Open Adobe Acrobat Acrobat.
2. Type in your @arizona.edu address (NOT the Math one) Leave password blank and hit enter.
3. UA WebAuth window, Enter your NetID credentials

4. You should be able to use Adobe Acrobat now
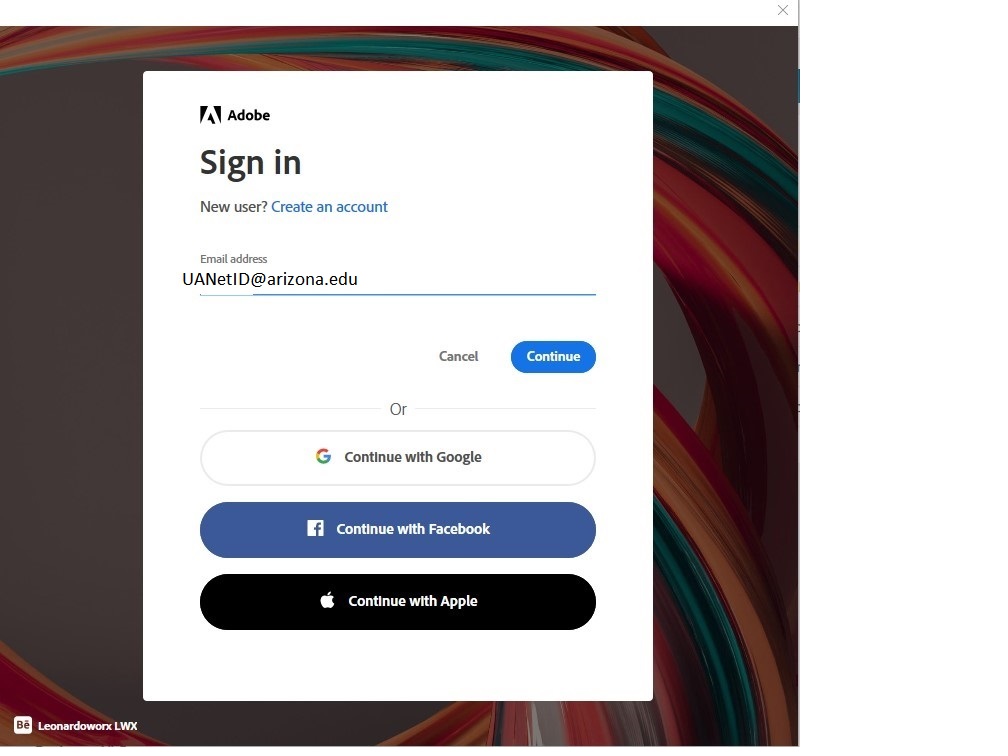
8.3. Logging in to Adobe Acrobat Pro DC for Macintosh
1. Open Adobe Acrobat
2. Click on Sign In on the upper right

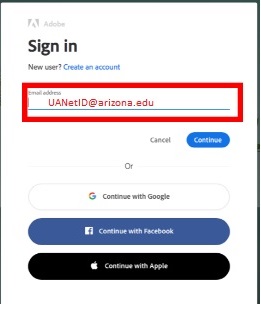
3. Type in your @arizona.edu address (NOT the Math one) and hit enter.
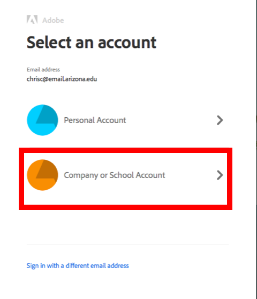
4. On the next screen choose "Company or School Account"
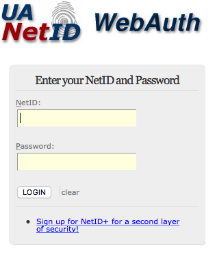
5. Finally you will see the familiar UANetID. Login and you can now use Adobe Acrobat.
9. Networks
9.1. Available Networks
Math Network -
This refers to the wired Ethernet network in the Math Tower, Math Teaching Lab, and ENR2. This network is managed by the Math IT Staff. If you are plugged into this network, you will have easy access to certain Math resources, such as the Konica Minolta Printer/Copiers.
Wireless Network-
The University maintains the UAWiFi and UAGuest networks. If you are on one of these, you are not on the Math Network. If you want to access services available only on the Math network, but don't want to plug in, you can use the Math VPN.
Visitors to the Department-
Visitors can plug into the Math network and still access services (such as the internet) that are not on the Trusted Net. For wireless, they can log on to UAGuest or use Eduroam (if they belong to a member institution).
9.2. Using Personal Equipment
You
are welcome to use your own personal computing equipment while working
within the Department of the Mathematics. However, any personal machine
connected to the Mathematics Department network (wireless or otherwise)
must comply with the University Computing Standard as well as all departmental computing policies.
Please visit the links to the right for information about getting online and available software.
10. Computers and Laptops
10.1. Computers and Laptops
The University provides one-time start-up assistance to new tenure-track faculty, under which the Mathematics Department obtains an office computer (with 3 years of hardware warranty support).
The University does not (May, 2002) provide replacement computers (after the initial start-up support) for its faculty. Tenure-track faculty members are encouraged to submit proposals for support of research activities.
10.2. Personal Equipment - Antivirus and Malware
Installing Sophos Anti-Virus:
- Go to https://softwarelicense.arizona.edu/sophos-central and follow the Home Use instructions. You will be asked for your UANetID and password.
- Select Sophos Home Free and Download Now and follow the instructions.
Removing Malware
Malware, short for malicious software, is any software program designed to cause harm to a computer system or designed to frustrate the user experience. In addition to viruses and trojan horses, this category of software includes spyware and adware. In short, malware constistutes all the software that evil people try to sneak onto your computer, but which you do not want to have on your computer. This page describes the three programs you should run to eliminate malware from a Windows system. (For more information on malware, see the Malware Wikipedia entry.)
Run Malwarebytes Anti-Malware
This program, which has a free version, does a good job of removing malware. Please download malwarebytes, and then install/run the software.
Run Sophos Anti-Virus
See instructions above.
Run Lavasoft Ad-Aware
- Download Lavasoft Ad-Aware.
- Install/run the software and initiate a full scan of your system.
- On the screen in which you are presented with a list of suspicious objects, you must manually select all the ones you wish to have removed. Unless a suspicious object leaps out at you as being something important, chances are that you want to remove all the suspicious objects that were found. To quickly select all objects, right-click one of the checkboxes and select the appropriate choice from the menu
- that will pop up. Click onNext to continue to the next screen and remove the objects.
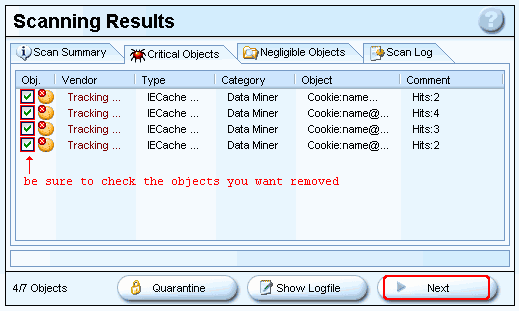
- When the confirmation dialog appears, click on OK.
11. High Performance Computing